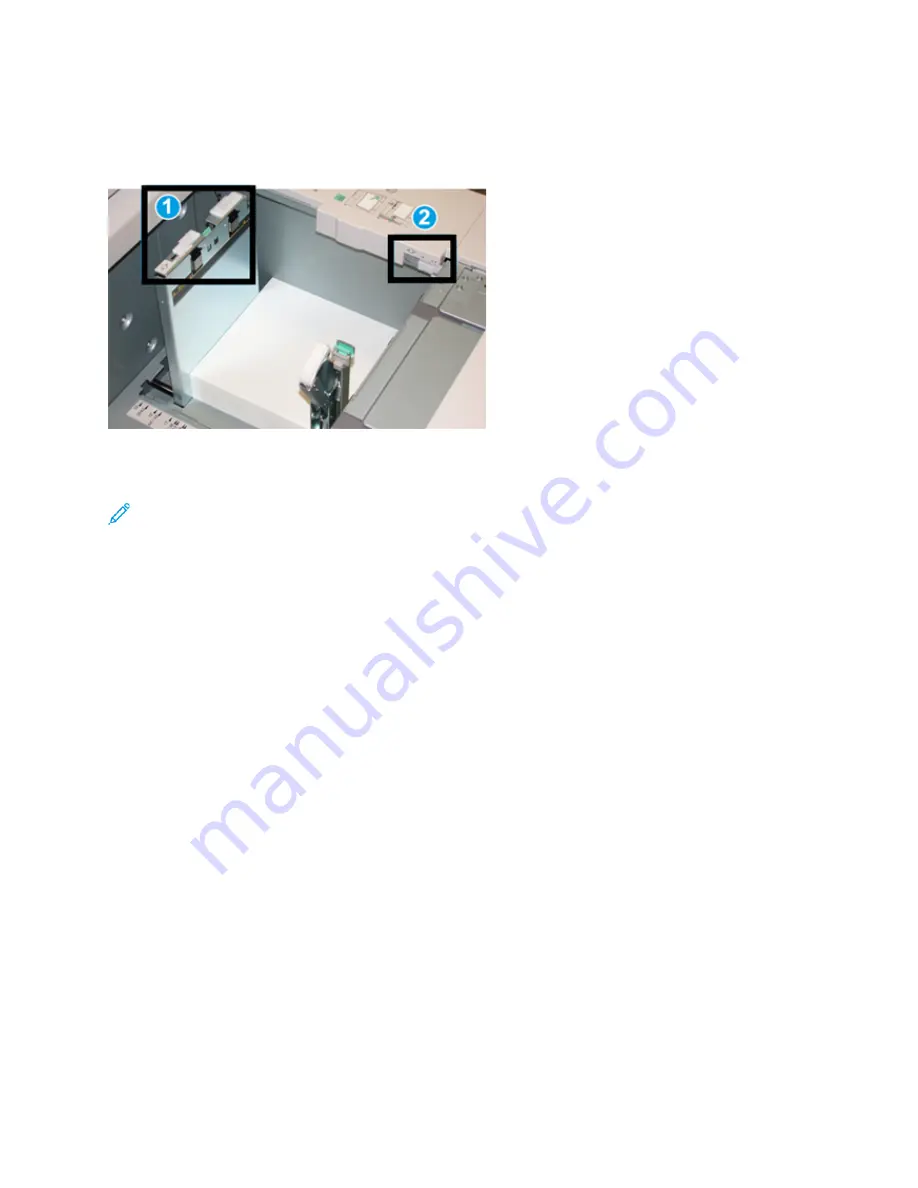
Skew Adjustment Levers for Trays 6-9
The skew adjustment levers are found in all paper trays. These levers are used to improve paper feed
accuracy and to reduce paper skew problems.
1. Rear Skew Adjustment Lever
2. Right Side Skew Adjustment Lever
Note:
These levers should remain in their default position. The position of these levers should
be changed only if there is a skew problem when running a specific print job and/or media
type. Changing the levers may cause more skew problems when running certain media types
such as coated, label, transparency and film.
Use the following procedure to set the skew adjustment levers:
1. Pull out the tray slowly until it stops.
The Tray Properties / Settings automatically display at the press User Interface (UI).
2. From the Tray Properties window, verify that the correct paper information is being used
including size, type, weight and paper curl or alignment option for the tray. Select
OK
and close
the Tray Properties window.
3. At the tray, slide the rear skew adjustment lever to the right.
4. Gently push in the tray until it comes to a stop.
5. Run your print job:
• If the paper is fed accurately without skew and the printed output is satisfactory; your task is
complete.
• If the paper is skewed and the printed output is unsatisfactory; proceed to the next step.
6. Pull out the tray slowly until it stops.
7. Verify the tray and paper settings at the print server.
8. Return the rear skew adjustment lever to its left, default position.
9. Slide the right-side skew adjustment lever toward the front of the paper tray.
10. Gently push in the tray until it comes to a stop.
11. Run your print job:
• If the paper is fed accurately without skew and the printed output is satisfactory; your task is
complete.
• If the paper is skewed and the printed output is unsatisfactory; proceed to the next step.
123


