74
4
4.4 Printing/Faxing
Click Properties (Options for Windows 3.1) to display the properties dialog box.
Select Fax for Job Type on the "Paper/Output" tab.
Make the necessary specification in the various properties tabs available and then
click OK to close the properties dialog box and to display the "Print" dialog box.
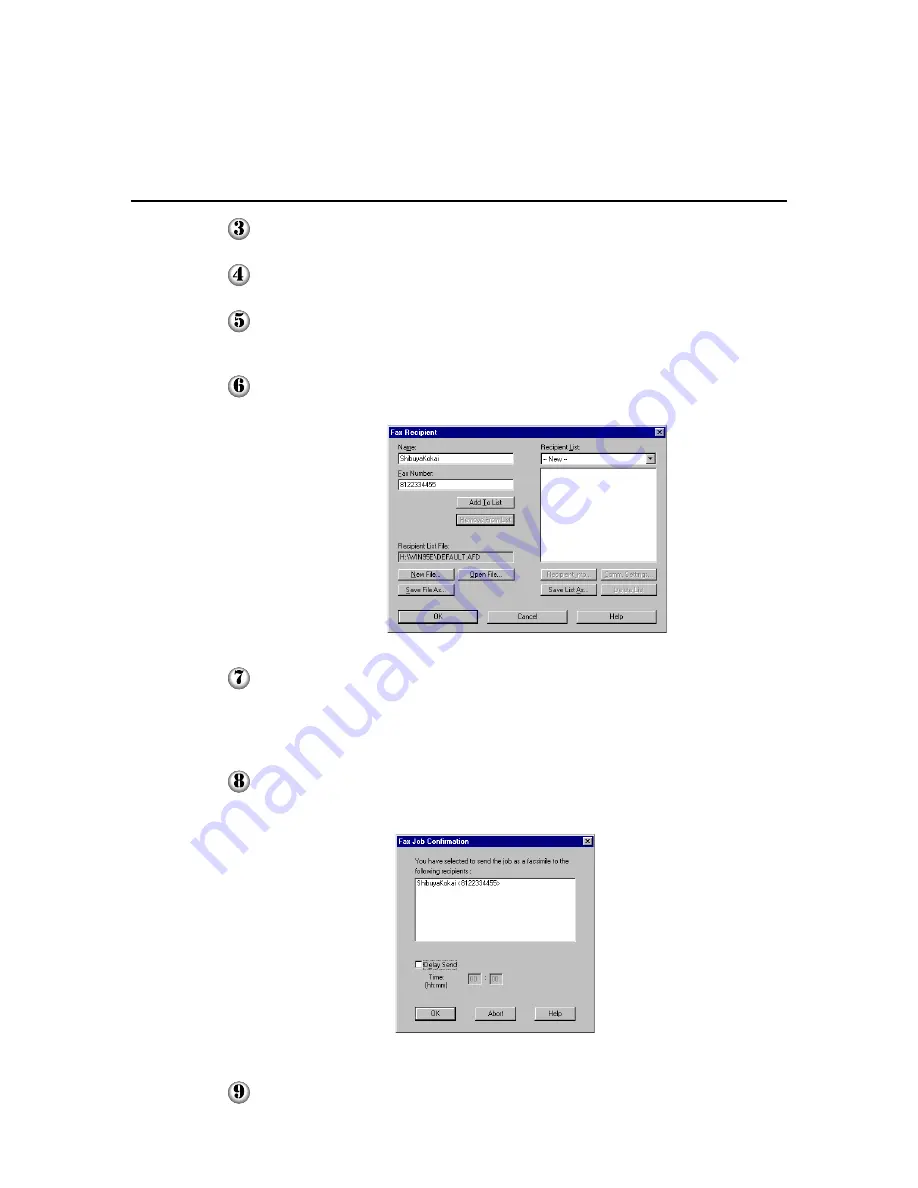
Click OK. The "Fax Recipient" dialog box appears.
Input the information for Name and Fax Number, and then click Add to List. Or
if you have previously saved the list of recipients, select it from Recipient List to
display the recipients' information. You can also access the list of recipients from
files other than the one specified in the "Recipient List" box, by clicking Open File.
Click OK to send the fax. The "Fax Job Confirmation" dialog box appears.
Click OK to confirm sending the fax job or Abort to cancel it. You may also select
Delay Send to specify the time for the fax job to be sent later.
Summary of Contents for Document Centre 400 series
Page 26: ...This page is intentionally left blank...
Page 116: ...This page is intentionally left blank...
Page 117: ...Precautions and Limitations 6 1 Precautions and Limitations 106...
Page 120: ...This page is intentionally left blank...
Page 147: ...135 Appendix Appendix C Print Utility...
Page 149: ...137 Appendix Appendix C Print Utility...
Page 151: ...139 Appendix Appendix C Print Utility...
Page 154: ...142 Appendix C Print Utility...
Page 156: ...144 Appendix C Print Utility...
Page 158: ...146 Appendix C Print Utility...
Page 159: ...147 Appendix Appendix C Print Utility...
Page 161: ...149 Appendix Appendix C Print Utility...
Page 162: ...150 Appendix C Print Utility...


