4-8
TM-401 User’s Guide
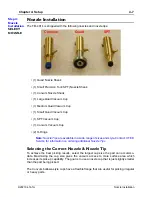
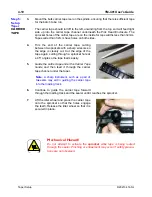
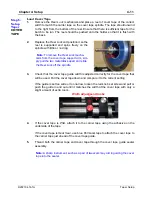
Nozzle Installation
D292104.7a.fm
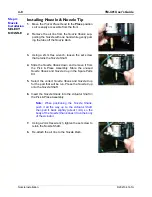
Installing Nozzle & Nozzle Tip
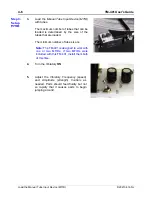
1.
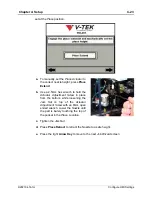
Move the
Pick & Place Head
to the
Place
position
so it is easily accessible from the front. .
2.
Remove the air line from the
Nozzle Shank
, sup-
porting the
Nozzle
with one hand while gently pull-
ing the tube off the
Nozzle Barb
.
3.
Using a 2mm Hex wrench, loosen the set screw
that retains the
Nozzle Shaft
.
4.
Slide the
Nozzle Shank
down and remove it from
the Pick & Place Assembly. Store the unused
Nozzle Shank
and
Nozzle Cup
in the Spare Parts
Kit.
5.
Select the correct
Nozzle Shank
and
Nozzle Cup
for the part that will be run. Press the
Nozzle Cup
onto the
Nozzle Shaft
.
6.
Insert the
Nozzle Shank
into the
Actuator Shaft
in
the Pick & Place Assembly.
Note:
When positioning the
Nozzle Shank
,
push it all the way up to the
Actuator Shaft
,
then pull it back slightly (about 1mm) so the
body of the
Nozzle Shank
doesn’t rub the body
of the
Actuator
.
7.
Using a 2mm Hex wrench, tighten the set screw to
retain the Nozzle Shaft..
8.
Re-attach the air line to the
Nozzle Barb
.
Step 4:
Nozzle
Installation
SELECT
NOZZLE
Summary of Contents for TM-401
Page 4: ......
Page 74: ...3 32 TM 401 User s Guide Run Tab D292104 6 fm ...
Page 146: ...5 44 TM 403 User s Guide Configure Inspection D292104 16 fm ...
Page 158: ...6 12 TM 401 User s Guide Preparing to Run a Pre programmed Job D292104 8a fm ...
Page 188: ...7 30 TM 401 User s Guide Adjusting PSA Seal Quality D292104 9a fm ...
Page 204: ...Appendix A Sensors A 6 SMC ZSE30 Vacuum Sensor D292104 11 fm ...
Page 208: ......
Page 284: ......
Page 286: ...Service and Parts Contacts 61053915 fm Page 2 ...
Page 288: ...TM 401 Document List D292104 15b fm Page 2 ...
Page 290: ......
Page 291: ......

