ENGINE
4-17
TX525 Service Manual
Rev. 000
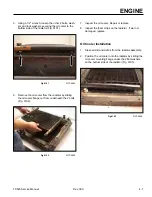
7. Using 1-1/16” and 1-1/8” wrenches, install the hy-
draulic outlet line to the oil cooler outlet fitting (Fig.
0138).
9. Slide the hose clamp into position with the tightening
screw head facing outward as shown. This will allow
access to the tightening screw through the grill as-
sembly when it is in position. Tighten the hose clamp
(Fig. 0140).
Fig 0138
PICT-5126
Fig 0140
PICT-5128
10. Position the radiator mount into the frame (Fig.
0141).
8. Slide the radiator inlet hose (bottom hose) onto the
radiator flange (Fig. 0139).
Fig 0141
PICT-5129
Fig 0139
PICT-5127
Summary of Contents for Dingo TX 525
Page 1: ...TX525 Service Manual Sitework Systems Form No 492 9195...
Page 3: ...ii Rev 000 TX525 Service Manual 8 01 10 Revision 000 REVISIONS...
Page 11: ...x Rev 000 TX525 Service Manual TABLE OF CONTENTS THIS PAGE INTENTIONALLY LEFT BLANK...
Page 243: ...ENGINE 4 190 Rev 000 TX525 Service Manual THIS PAGE INTENTIONALLY LEFT BLANK...
Page 263: ...ELECTRICAL 5 20 Rev 000 TX525 Service Manual THIS PAGE INTENTIONALLY LEFT BLANK...
Page 377: ...HYDRAULIC SYSTEM 6 114 Rev 000 TX525 Service Manual THIS PAGE INTENTIONALLY LEFT BLANK...
Page 479: ...DRIVE SYSTEM 7 102 Rev 000 TX525 Service Manual THIS PAGE INTENTIONALLY LEFT BLANK...
Page 553: ...HYDRAULIC TESTING 9 20 Rev 000 TX525 Service Manual THIS PAGE INTENTIONALLY LEFT BLANK...


