7. HYDRAULIC SYSTEM
- 127 -
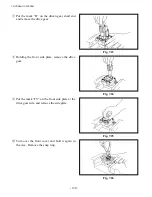
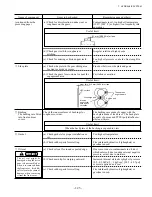
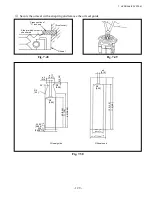
Fig. 7.41
Fig. 7.39
Fig. 7.40
Fig. 7.42
⑧
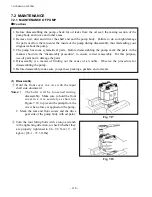
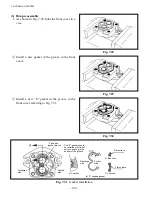
Install the rear side plate in the pump body, as
shown in Fig. 7.35.
⑨
Apply grease on a new gasket in some points
and install the gasket in the rear cover groove.
⑩
Install the “3”-shaped gasket in the rear cover,
as shown in Fig. 7.31.
The rear cover is commonly used for the
“L” (counterclockwise rotation) type and
the “R” (clockwise rotation) type. Align the
discharge side with the suction side.
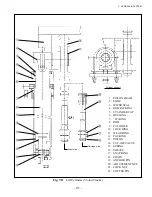
Discharge side
Gasket groove
”E” gasket
Suction side
Summary of Contents for FB10-7
Page 2: ......
Page 4: ...No SEB 81BBE...
Page 8: ...No SEB 81BBE...
Page 9: ...No SEB 81BBE Fig 1 Overall Dimensions Unit mm in...
Page 10: ...No SEB 81BBE...
Page 28: ...1 BATTERY AND CHARGER 16 NOTE...
Page 30: ...2 MOTORS 18 DRIVE UNIT Fig 2 1 Drive Motor Installation DRIVE AXLE DRIVE MOTOR...
Page 42: ...3 CONTROL SYSTEM 30 Fig 3 2 Inverter Assembly 1 0 to 2 5 ton Trucks...
Page 43: ...31 3 CONTROL SYSTEM Fig 3 3 Inverter Assembly 3 0 to 3 5 ton Trucks...
Page 44: ...3 CONTROL SYSTEM 32 Fig 3 4 Controller Wiring 1 0 to 2 5 ton Trucks...
Page 45: ...33 3 CONTROL SYSTEM Fig 3 5 Controller Wiring 3 0 to 3 5 ton Trucks...
Page 133: ...7 HYDRAULIC SYSTEM 121 Fig 7 27 Remove the oil seal from the front cover...
Page 160: ...8 LOAD HANDLING SYSTEM 148 NOTE...

