


172
2.
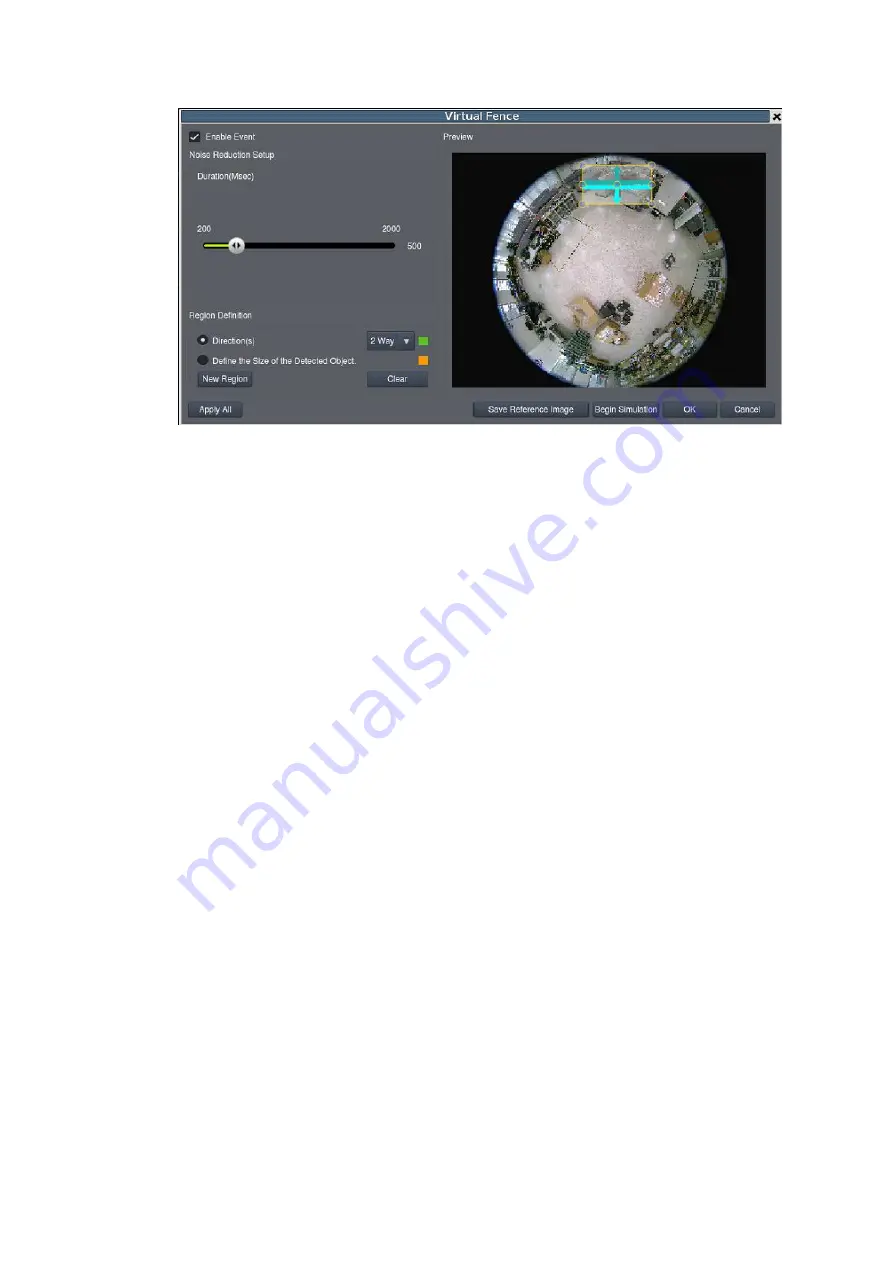
Click and drag the white arrows along the window border around the one/two-
way arrow to resize the space between the fences/adjust the length of the
fences.
3.
Turn the window border with the orange arrow to change the directions of the
fences.
4.
If an object size has not yet been defined, select
Define Object
and click the
New Region
button to create an object box.
5.
Click and drag the corners of the object box to define the minimum size of the
fence-crossing objects that will be detected.
6.
Adjust the sliders: (Settings will be applied to all existing windows)
Duration (Sec)
- Adjusts how much time between each check for the
fence-crossing.
7.
Click
OK
to save the changes and exit the popup.
Testing Detection Windows
To test a detection window:
1.
Right-click the camera entry in the Camera List below the Live View, then
highlight and click the
VI Setup > Virtual Fence
>
Select Camera
option.
2.
Click
Save Reference Image
to have a reference image saved and the system
will use this saved image to compare with the live recording image to see if
Summary of Contents for NVR7312(2U)
Page 1: ...NVR7300 Series User Manual Release 1 2...
Page 72: ...72 1st JBOD 2nd JBOD Last JBOD...
Page 92: ...92...
Page 98: ...98 2 Click the Apply button to apply the schedule and OK to exit the dialog...
Page 100: ...100...
Page 127: ...127...
Page 249: ...249 Jumps to the next segment The play speed can be adjusted from 1x to 8x...
Page 286: ...286 12 5 5 FTP Setting It allows you to configure FTP server settings...
Page 336: ...336 2 Accept the terms in the license agreement and click Next...


