67
Tracking Targets (Tracking Function)
A
d
v
anc
ed
O
pera
tio
ns
Enabling the Tracking Function
1
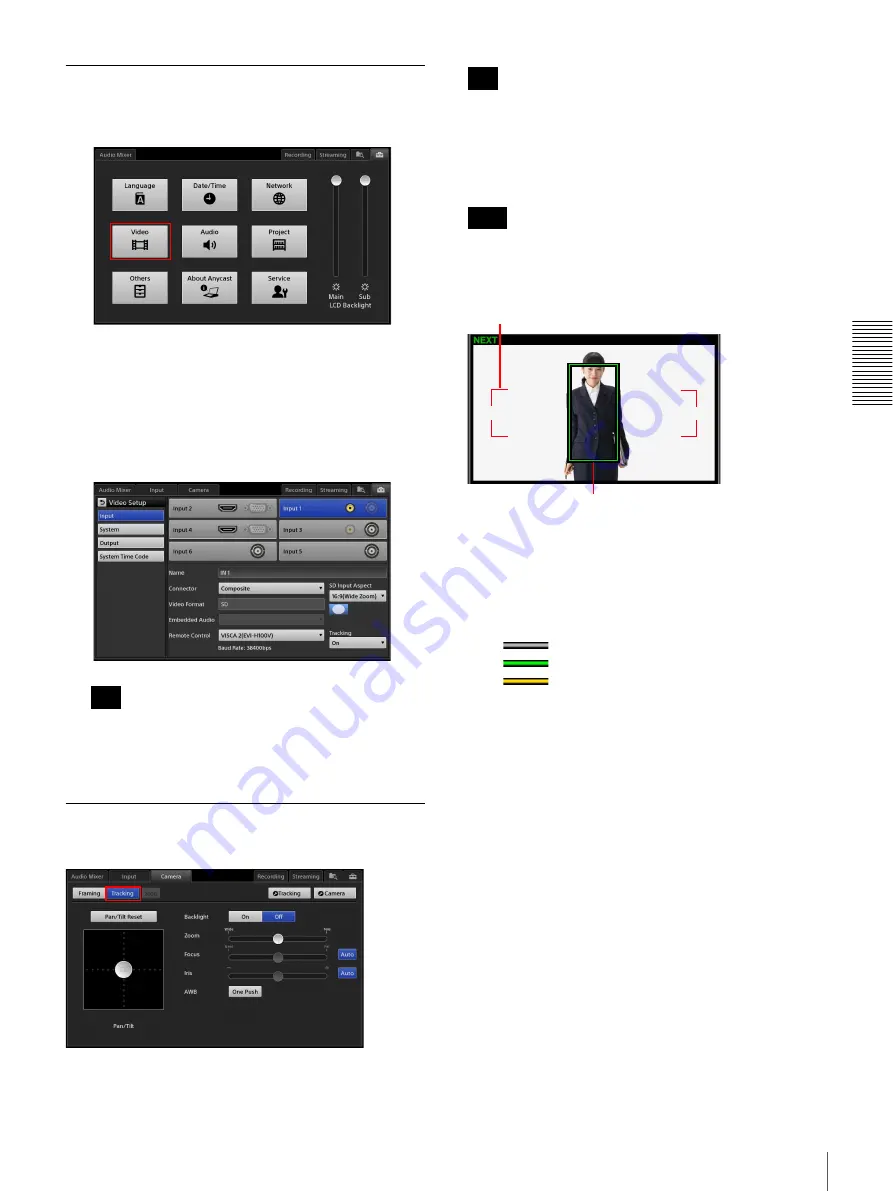
Display the [System Setup] screen, and tap [Video].
The [Video Setup] screen appears.
2
Tap [Input], and select the input connector of the
target remote camera for control.
3
Select the target remote camera for control in
[Remote Control], and select [On] for [Tracking].
The tracking function can only be configured for one
video input, with the video input that was configured
last having priority.
Using Tracking Mode
In the [Camera] screen, tap [Tracking] to enable it.
Tracking mode is enabled.
The mode cannot be changed while the camera is moving.
Wait for the camera to stop before tapping [Tracking].
The tracking status appears in the [NEXT] viewer during
tracking mode.
The tracking status will not be displayed if an [Effect] is
configured. Tracking cannot be started when the tracking
status is not displayed.
Search area indicator:
Indicates the area in which the
camera can find a tracking target.
Tracking quality indicator:
Indicates the tracking
quality or whether tracking is in standby by its color.
The size of the frame is configured in the [Size]
(page 68) of the [Tracking Settings] screen.
•
: Tracking standby
•
: Good
•
: Warning
Configuring tracking settings
Configure settings related to the tracking target.
First select a preset for the tracking target’s movement,
and then perform fine adjustments.
1
In the [Input] list, tap the input source for which the
tracking function is enabled to display its video in the
[NEXT] viewer.
The [Camera] tab appears in the sub screen.
Tip
Tip
Note
Search area indicator
Tracking quality indicator
Summary of Contents for AWS-750
Page 121: ......


