Scan features
228
4. Special Features
18
Scanning to email
This feature may not be available depending on model or optional goods
(see "Features by model" on page 7).
Setting up an email account
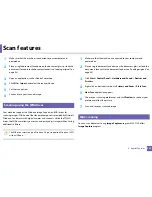
1
Access the SyncThru™ Web Service (see "Using SyncThru™ Web Service"
on page 249).
2
Select
Settings
>
Network Settings
and
Outgoing Mail Server(SMTP)
.
3
Enter the IP address in dotted decimal notation or as a host name.
4
Enter the server port number, from 1 to 65535.
5
Check the box next to
SMTP Requires Authentication
to require
authentication.
6
Enter the SMTP server login name and password.
7
Press
Apply
.
•
If the authentication method of SMTP server is POP3 before SMTP, put a
check mark of
SMTP Requires POP Before SMTP Authentication
.
•
Enter the IP address and port number.
Scanning and sending an email
1
Place a single document face down on the document glass, or load the
documents face up into the document feeder (see "Loading originals" on
page 48).
2
Select (scan)
>
Scan to Email
on the control panel.
3
Enter the sender’s and recipient’s email address.
You can send an email to yourself by activating the
Auto Send To Self
option in the
Settings
>
Scan
>
Scan To E-mail
on SyncThru™ Web Service.
4
Enter an email subject and press
OK
.
5
Select the file format to scan, and press
OK
.
6
The machine begins scanning and then sends the email.
Summary of Contents for Multifunction Xpress C48 series
Page 3: ...3 BASIC 5 Appendix Specifications 111 Regulatory information 120 Copyright 133 ...
Page 78: ...Redistributing toner 78 3 Maintenance ...
Page 80: ...Replacing the toner cartridge 80 3 Maintenance 1 2 ...
Page 82: ...Replacing the imaging unit 82 3 Maintenance ...
Page 84: ...Replacing the waste toner container 84 3 Maintenance 2 1 ...
Page 89: ...Cleaning the machine 89 3 Maintenance 1 2 1 2 ...


