Operation
3-43
3160-A2-GB22-10
December 1996
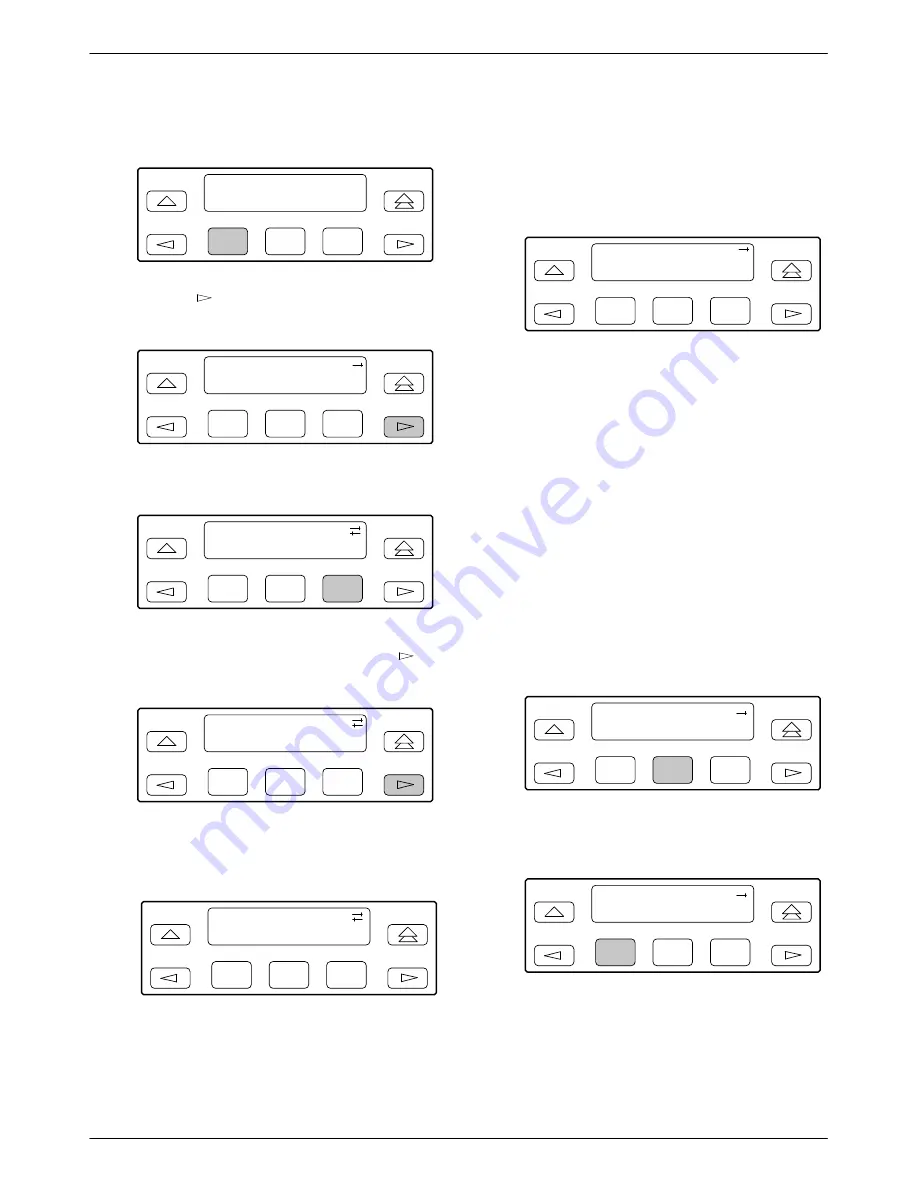
3. Press F1 to select Edit.
F1
Choose Funct:
Edit
Save
F2
F3
4. Press the
key from the Edit screen to display
the Chan selection.
F1
Edit:
DTE
Port
NET
F2
F3
5. Press F3 to select Chan.
F1
Edit:DTE
Port
NET
Chan
F2
F3
6. From the Channel Config screen, press the
key to scroll the ports onto the screen.
F1
Channel Config:
Dsply
Clear
DTE
F2
F3
7. Select the desired port by pressing its
corresponding Function key.
F1
Channel Config:
Prt1
Prt2
Prt3
F2
F3
8. The configuration option for the data port
channel allocation destination appears on the
screen. Press F2 (NET) to assign this port to the
Network T1 interface, or F3 (DTE) to assign this
port to the DSX-1 Drop/Insert T1 interface.
F1
Assign To:NET
Next
NET
DTE
F2
F3
9. Press F1 (Next) to display the appropriate
configuration options on the screen. Use one of
the following examples, depending on whether
you are assigning by block, ACAMI, or i.
Differences Using the Async Terminal: To allocate data
ports, choose a port selection from the main/
configuration/edit/channel menu. From these screens, you
can specify whether the assignment is by block, ACAMI,
or individual port.
Block Channel Assignment Method Example
To assign by the block method,
1. The Assign By configuration option screen
appears after you select a port. To assign by block,
press F2 (Block).
F1
Assign By:Block
Next Block ACAMI
F2
F3
2. Press F1 (Next) to display the next configuration
option (Port Rate).
F1
Assign By:
Next Block ACAMI
F2
F3
Summary of Contents for ACCULINK 316x
Page 4: ...ACCULINK 316x DSU CSU C December 1996 3160 A2 GB22 10 Notices...
Page 23: ...Introduction 1 9 3160 A2 GB22 10 December 1996 Figure 1 6 Auxiliary Backplane...
Page 77: ...Operation 3 35 3160 A2 GB22 10 December 1996 Figure 3 24 Example Channel Allocation...
Page 135: ...A 1 3160 A2 GB22 10 December 1996 Front Panel Menu A...
Page 136: ...ACCULINK 316x DSU CSU A 2 December 1996 3160 A2 GB22 10...
Page 137: ...Front Panel Menu A 3 3160 A2 GB22 10 December 1996...


