51
DVD-ROM & CD-R/RW Drive
CAUTION
When inserting or removing a disc, be careful not to touch the lens of the drive.
1
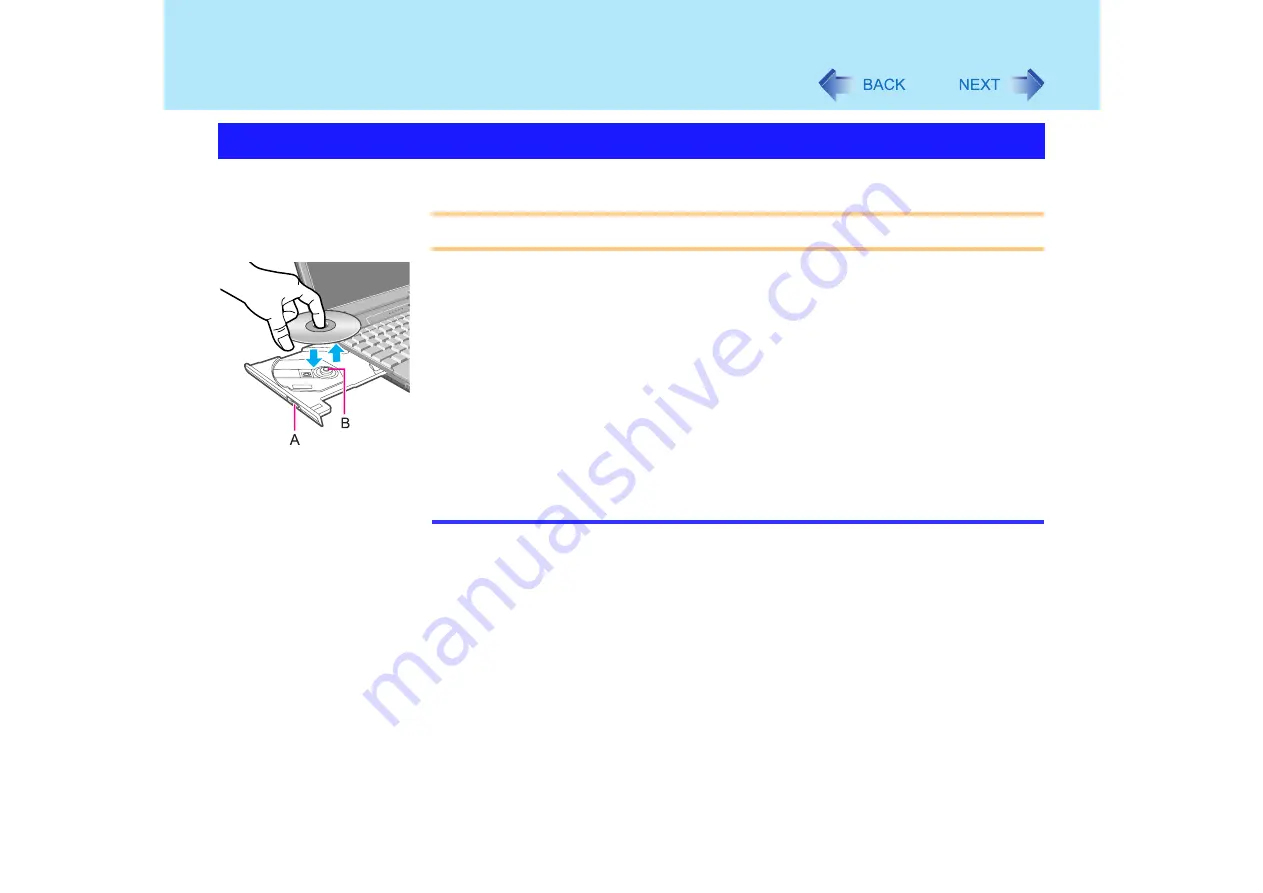
Press the eject button (A) while the computer's power is on.
Slowly pull out the tray.
2
Insert/Remove a disc.
Inserting
Place the disc with the label facing upward in the drive and push down the
center of the disc until it clicks in place.
Removing
Hold down on the center spindle (B) and gently lift up on the edge of the disc.
3
Close the tray.
Do not press the eject button.
NOTE
To remove a disc when the computer is powered off, insert a pointed object (e.g., the
bent-out tip of a paper clip, or the tip of a ballpoint pen) into the emergency hole.
Pushing it completely to the end will free the tray so that it can be pulled out. (The
position of the emergency hole differs depending on the drive.)
If the vibration of the CD/DVD drive is excessive, check to see if the disc is inserted
correctly, and check that the disc is in good condition. If the disc is good and inserted
correctly, set [CD/DVD Drive Speed] to [Low] in [Main] menu of the Setup Utility. Or,
when writing to a CD using B's Recorder, you can minimize vibration while writing by
setting the writing speed at [8x] or less.
For AutoPlay CDs:
• If an AutoPlay CD does not start after the computer resumes from the standby or
hibernation modes, remove the disc from the drive, then reinsert the disc again after
a 15 second wait.
• An AutoPlay CD may start during file access, depending on the status of the disc.
Setting a Disc


