


- 75 -
3. Scan
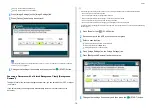
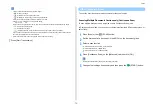
• There are three methods to display preview images.
–
: Displays full page.
–
: Displays across the width of the screen.
–
: Displays the scanned page at the same magnification.
• Press [Full Screen] to display the preview image in full screen.
• Use
,
,
, and
to scroll the preview image.
• When scanning multiple pages of documents, use the navigation button to switch between the pages.
–
: Displays the previous page.
–
: Displays the next page.
–
: Displays any page. Press this button and enter page number you want to display.
• If you set the next document on the ADF or document glass and press [Preview], the machine scans the
document and displays the scanned document.
• Press [Cancel Preview] to close the preview screen and cancel sending.
7
Press [Start Transmission].
This section describes how to read documents for the scan function.
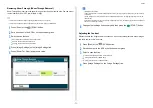
Scanning Multiple Documents Continuously (Continuous Scan)
To scan multiple documents as a single job, enable Continuous Scan mode.
In Continuous Scan mode, you can scan your documents from the ADF, document glass, or
both of them.
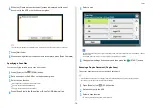
1
Press [Scan] or the
(SCAN) button.
2
Set the first sheet of a document in the ADF or on the document glass.
3
Select a scan function.
Sending Scanned Data as an E-mail Attachment
Saving Scanned Data in USB Memory
Saving Scanned Data in a Shared Folder
4
Press [Continuous Scan] on the [Advanced] tab to set it to [ON].
Pressing [Continuous Scan] switches between [ON] and [OFF].
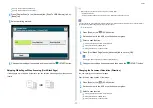
5
Change other settings if necessary, and then press the
(START) button.
Other Settings to Scan
Summary of Contents for MC573
Page 1: ...MC573 ES5473 MFP Advanced Manual...
Page 18: ...18 1 Basic Operations 7 Select a volume level...
Page 31: ...2 Copy Useful Functions For a Better Finish Color Settings Advanced Copy Settings...
Page 141: ...141 4 Print 5 Press Color Menu 6 Press Adjust Registration 7 Press Yes...
Page 489: ...489 11 Utility Software Storage Manager plug in Create or edit a file to download to a device...
Page 507: ...46532802EE Rev2...


