Registering/specifying settings
9
VarioLink 2221/2821/3621
9-11
Regist
er
ing/
spe
c
if
ying set
ti
ngs
Chapter 9
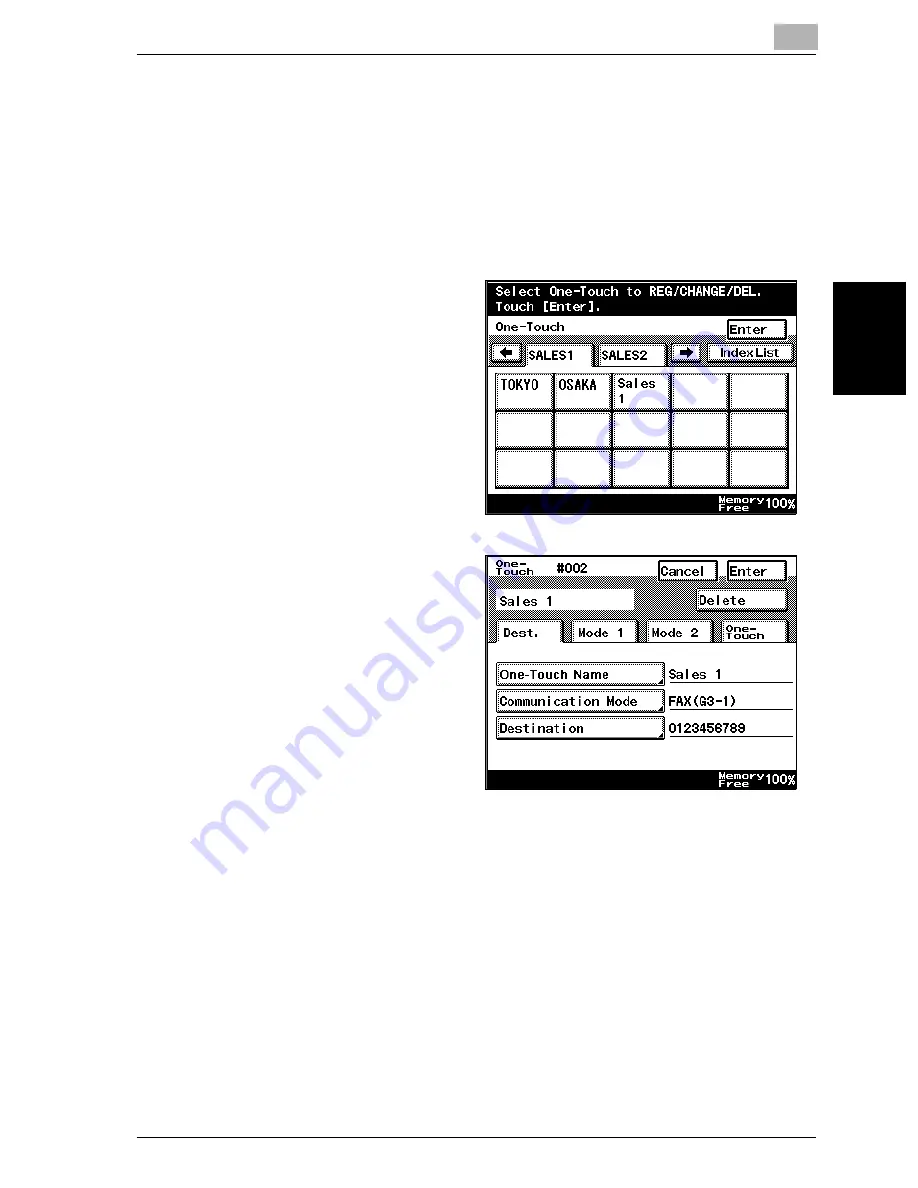
Changing/deleting a one-touch dial button
1
Perform steps 1 through 4 of the procedure for registering a one-touch
dial button, until the screen for selecting a one-touch dial button ap-
pears.
–
For details, refer to “Programming a one-touch dial button with a
fax number” on page 9-4.
2
Touch the one-touch dial
button whose settings
are to be changed.
A confirmation screen
appears, showing the
specified settings.
3
Touch the button for the
setting to be changed,
and then change the
setting.
–
To delete the one-
touch dial button,
touch [Delete].
4
Touch [Enter] in each screen until the standby screen (initial screen) ap-
pears.
Summary of Contents for VarioLink 2221
Page 30: ...1 Before use Chapter 1 Before use...
Page 44: ...2 Transmission Chapter 2 Transmission...
Page 83: ...2 Transmission 2 40 VarioLink 2221 2821 3621 Transmission Chapter 2...
Page 84: ...3 Reception Chapter 3 Reception...
Page 92: ...4 Troubleshooting Chapter 4 Troubleshooting...
Page 98: ...5 Specifications Chapter 5 Specifications...
Page 100: ...6 Useful transmission functions Chapter 6 Useful transmission functions...
Page 134: ...7 Useful reception functions Chapter 7 Useful reception functions...
Page 141: ...7 Useful reception functions 7 8 VarioLink 2221 2821 3621 Useful reception functions Chapter 7...
Page 142: ...8 Polling Chapter 8 Polling...
Page 148: ...9 Registering specifying settings Chapter 9 Registering specifying settings...
Page 184: ...10 Utility mode Chapter 10 Utility mode...
Page 334: ...12 Reports and lists Chapter 12 Reports and lists...
Page 352: ...13 Appendix Chapter 13 Appendix...
Page 363: ...13 Appendix 13 12 VarioLink 2221 2821 3621 Appendix Chapter 13...
Page 364: ...Printing for Professionals Beyond the Ordinary...


