Chapter 4 SPAN Operation
CPT7 and CPT7700 Installation and Operation User Manual v12
97
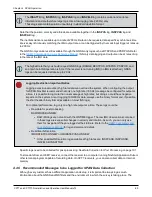
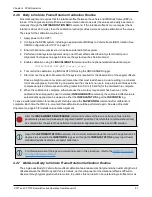
2. Connect the DMI to the DMI A+ (Pin 14), DMI A- (pin 15) and GND (pin 8) connections on the AUX 2
connector.
3. Connect an external power supply to the DMI.
The power required for the DMI depends on the DMI used. Refer to the DMI user documents for more
information.
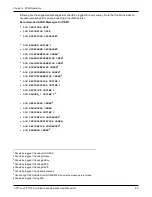
Configure a DMI
1. Send the following command to enable a DMI on the CPT7 wheel sensor inputs.
DMICONFIG DMI1 ENABLE ENCLOSURE
2. Send the following commands to log the DMI data.
LOG DMICONFIGA ONCHANGED
LOG RAWDMIA ONNEW
LOG INSUPDATESTATUSA ONNEW
3. Check the
RAWDMI
log to ensure the DMI is producing data.
4. Check the
INSUPDATESTATUS
log to ensure the DMI is being used in the SPAN solution.
If there is no DMI data being produced or the DMI status is not USED, refer to
For more information, see the
DMICONFIG
command,
RAWDMI
log and
INSUPDATESTATUS
log in
the
OEM7 Commands and Logs Reference Manual
.
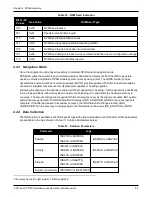
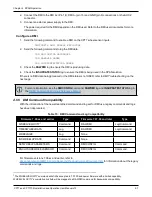
4.5.5 DMI Command Compatibility
With the introduction of the new streamlined command and log set for DMI use, legacy commands and logs
have been deprecated.
Firmware 7.06.xx and earlier
Type
Firmware 7.07.00 and later
Type
WHEELVELOCITY
1
Command
RAWDMI
Log/Command
TIMEDWHEELDATA
Log
RAWDMI
Log/Command
WHEELSIZE
Log
None
INSWHEELUPDATE
Command
None
SETWHEELPARAMETERS
Command
DMICONFIG
Command
ENCLOSUREWHEELSENSOR
Command
DMICONFIG
Command
Table 15: DMI Command and Log Compatibility
For firmware versions 7.06.xx and earlier, refer to
docs.novatel.com/OEM7/Content/Appendix/PreviousVersionsDocument.htm
for information about the legacy
commands and logs.
1
The WHEELVELOCITY command will still be accepted in 7.07.00 and newer firmware with a limited capability.
WHEELVELOCITY’s cumulative tick field will be mapped to a RAWDMI command for backwards compatibility.


