Procedure - Installing drives in the E2760 controller-drive
tray
About this task
The controller-drive tray is shipped with the drive drawers installed, but the drives are not installed.
Follow the steps in this procedure to install the drives.
Attention:
Risk of equipment malfunction – To avoid exceeding the functional and
environmental limits, install only drives that have been provided or approved by NetApp, Inc.
Drives might be shipped but not installed. System integrators, resellers, system administrators, or
users can install the drives.
Attention:
Risk of equipment malfunction – All 60-drive trays have a limit of five solid state
drives (SSDs) per drawer. If you exceed this limit for SSDs in a particular drawer, the power
source in the drawer could fail.
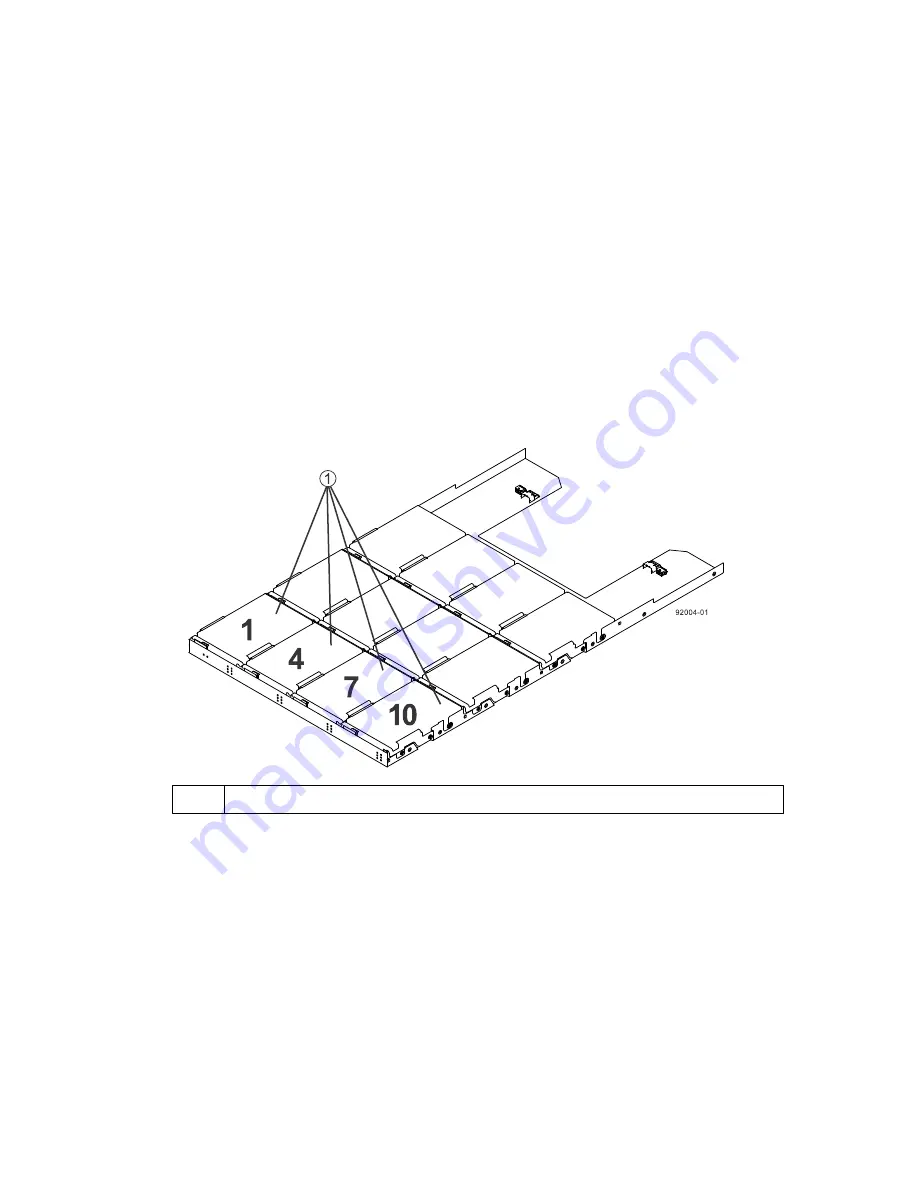
1
Slots requiring drives in each drawer
If you are installing fewer than 60 drives, if you have SSDs, or if your drives have different
capacities, do the following:
•
Install the drives in the front four slots (shown in the figure as slots 1,4, 7, and 10) of each drawer
to maintain adequate airflow for cooling. You must install at least 20 drives in the tray.
•
Distribute any remaining drives across the drawers.
You must install an equal number of each type of drive in each drawer to use the Drawer Loss
Protection (DLP) feature in SANtricity software. If you have extra drives, you can install them,
but they will not be used for DLP.
•
Distribute any SSDs evenly across the drawers.
•
Do not install more than five SSDs in each drawer (no more than 25 SSDs in each tray). The
power source in the drawer can fail.
Attention:
Risk of equipment damage – If you want to move the 60-drive tray to a new location
after installing the drives, you must remove all of the drives from the drive tray following proper
50 | E2700 Controller-Drive Tray and Related Drive Trays Installation Guide
Summary of Contents for E2760
Page 2: ......


