


User’s Guide – Osprey 75/102/130
Chapter 2: Product Overview
27
AP-75102, Rev. 2.0, 28/11/2007
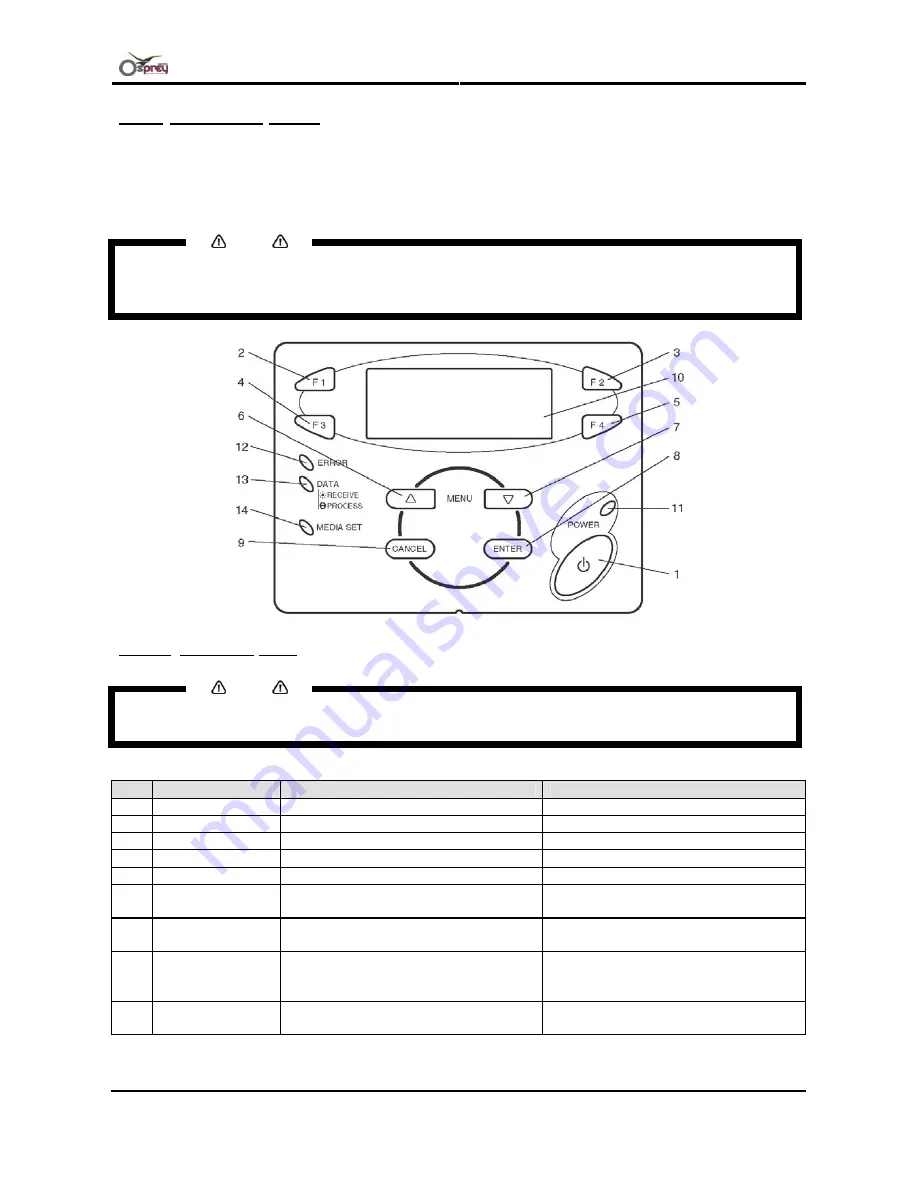
2.2.3 Operation panel
The operation panel is used to set operational conditions, displays the status of the printer, and sets other
functions.
The names and functions of the operation keys and status lamps are explained below.
Notes
•
See the sections below on how to use the operation panel.
•
When setup menus using the operation panel: “Menu setup on the operation panel”
•
When setting functions using the operation panel: “Operating from the operation panel”
2.2.3.1 Operation Keys
Notes
•
Some keys have multiple functions and names depending on the printer status (normal or setup menu
display). Refer to: "Printer status" for more details.
No. Name
Normal
setup menu display
1
[POWER] key
Switches the printer ON and OFF.
Switches the printer ON and OFF.
2
[F1] key
Executes the function assigned to F1.
Executes the function assigned to F1.
3
[F2] key
Executes the function assigned to F2.
Executes the function assigned to F2.
4
[F3] key
Executes the function assigned to F3.
Executes the function assigned to F3.
5
[F4] key
Executes the function assigned to F4.
Executes the function assigned to F4.
6 [MENU
▲
] key
Changes the LCD monitor display to
the setup menu status.
Changes the menu in reverse order.
7 [MENU
▼
] key
Changes the LCD monitor display to
the setup menu status.
Changes the menu in forward order.
8 [ENTER]
key
Changes the LCD monitor display to
the print mode display.
Determines the new parameter value
and changes the LCD monitor display
to the next menu.
9 [CANCEL]
key
–
Cancels the new parameter value and
returns to the previous hierarchy menu.


