


Getting Started Manual
WP7Zi-GSM-E RevB
48
Specific Menu Bar functions are referenced using arrow-separated path
descriptions. For example, the
Save Setup
function is referenced as
File →
Save Setup
.
PLEASE NOTE THE FOLLOWING
:
For common oscilloscope operations, you don’t need to use the top menu
bar (since you can access most dialogs from the Front Panel or from the
Descriptor Labels). However, it is the only way to access setup or other
dialogs for
Display Setup
,
Save or Recall Waveform
,
Save or Recall Setups
,
Print Setup
,
Vertical (Channel), Horizontal, or Trigger Status
,
Memory
(Reference Waveform) Setup
,
Pass/Fail Setup
, or
Utilities and
Preferences Setup
.
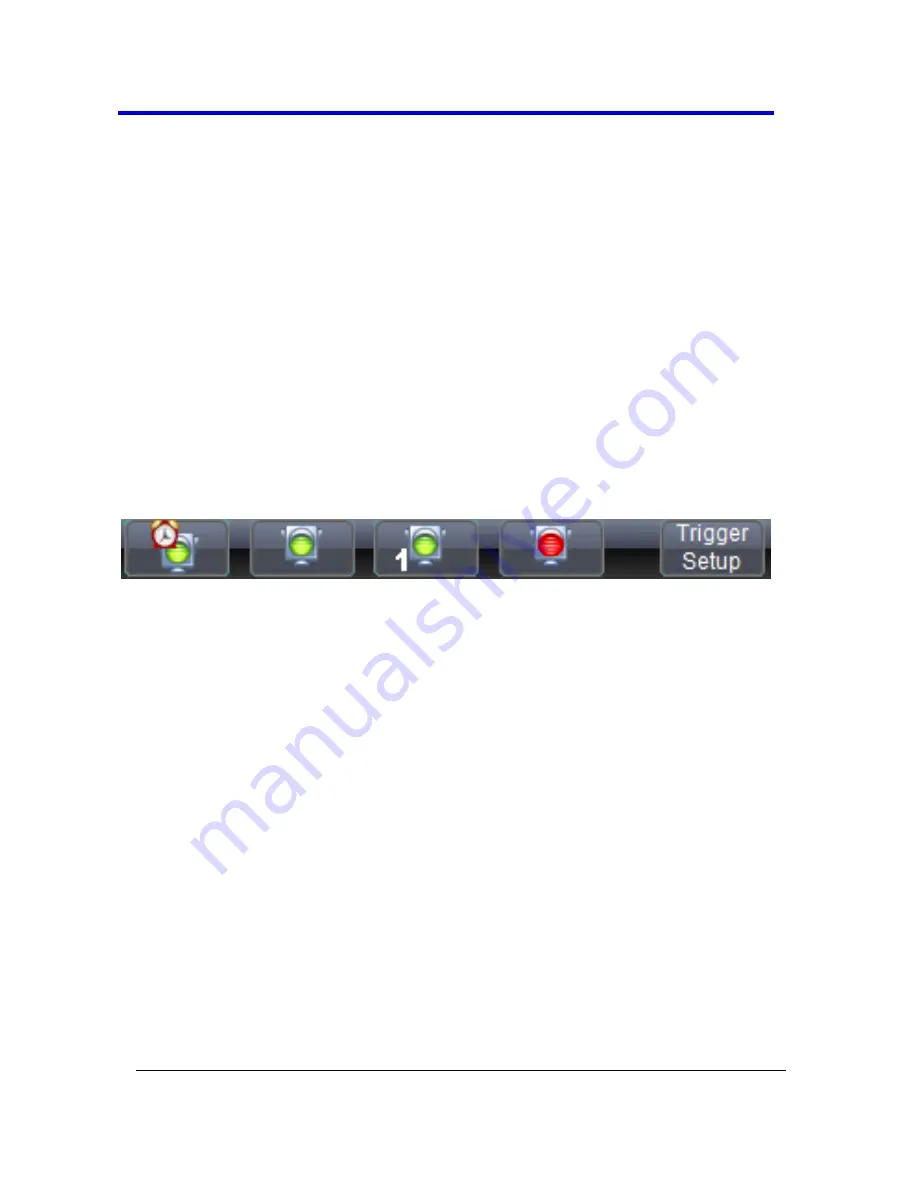
The Quick Access Toolbar
The Quick Access toolbar is located on the right side of the menu bar. You
can use these toolbar buttons to quickly access trigger functions.
Auto
- Press to turn on
Auto Trigger
mode, which triggers the
oscilloscope after a time-out, even if the trigger conditions are not
met.
Normal
- Press to turn on
Normal Trigger
mode, which triggers the
oscilloscope each time a signal is present that meets the conditions
set for the type of trigger selected.
Single
- Press to turn on
Single Trigger
mode for the selected
channel, which arms the oscilloscope to trigger once (single-shot
acquisition) when the input signal meets the trigger conditions set
for the type of trigger selected. If the oscilloscope is already armed,
it forces a trigger.
Stop
- Press to prevent the oscilloscope from triggering on a signal.
If you boot up the instrument with the trigger in
Stop
mode, the
message "no trace available" is shown.
Trigger Setup
- Press to open the
Trigger Setup
dialog. Corresponds
with screen menu selection:
Trigger → Trigger Setup
.


