


5 | Commissioning
Starting HRSoft and setting up the database connection manager
Database assistant
Server name:
Information
Update
Host
Data-location:
Product:
Level:
Edition
Version:
Windows-Authentification
SQL-Server Authentification (recomm.)
SQL-Server user name:
Password
Database selection
Database on server
OK
Cancel
Test connection
Create HR database
Delete database
Connect server
Login on server
ErsaHrData
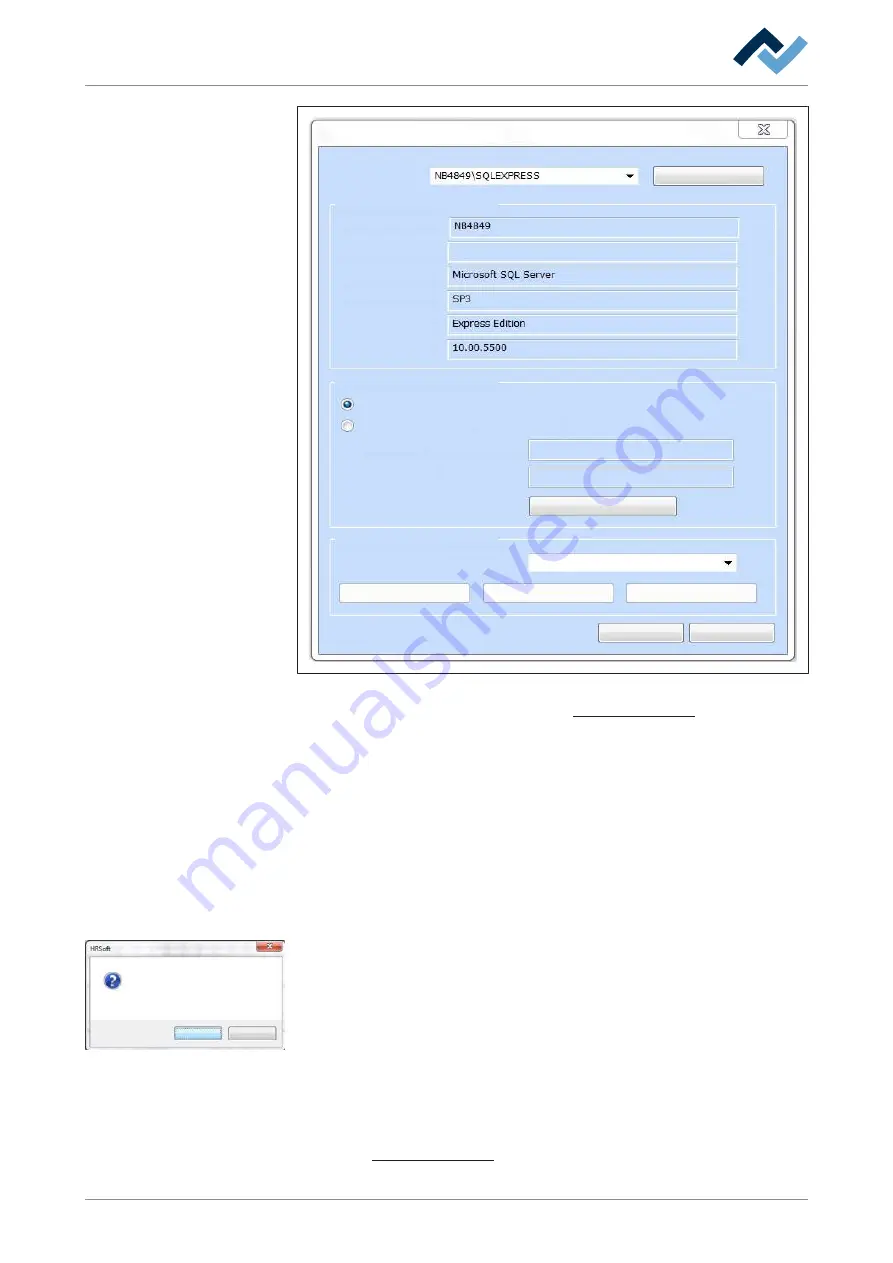
Fig. 10:
Database Connection Manager This window appears when you first start HRSoft.
With regard to this point, please read the chapter
ü
Make the following settings:
a) Select the item [Eigener PC\SQLEXPRESS] in the drop-down menu [Server
name:].
b) Click on the [Database selection] button in the [Create HR database] frame.
c) Select the item [ErsaHrData] in the drop-down menu [Database on server].
d) Click on the [Test connection] button.
ð
A query dialog is displayed.
e) Confirm with [OK].
f) Close the [Database assistant] by clicking on the [OK] button.
OK
Cancel
Attention:
Cameras and axes will be referenced now
Keep clear the moving area
and the pick up region!
ð
The message [Cameras and axes will be referenced now] appears.
g) Click on the [OK] button to reference the camera and axles.
ð
Cameras and axles have been referenced. Keep processing path and pick-
up area free!
ð
Wait until referencing ends. Referencing can take up to 30 seconds.
a) Do not click on the [Cancel] button, otherwise various functions will not be
supported.
ð
HRSoft start screen appears.
You can change the database settings later. With regard to this point, please read
the chapter Database assistant [
Ersa GmbH
3BA00207_01 Operating Instructions HR 600_2 | Rev. 3
46 / 169


