


6 | Function description
Working with the HR 600/2 unit
e) Select a template and confirm your selection with [OK].
ð
The template will be copied and displayed in the [Profiles] tab.
f) In the directory tree under [Library], click on the directory in which the profile
should be saved.
g) Subsequently, click on the [Add] button in the [Profile parameters] frame.
ð
The copied profile template is ready to process the [Profile parameters].
To enable a profile:
a) In the function selection field, enable the tab [Profile library].
ð
The window [Profiles] is displayed in the display window: If you are logged
in as a default user, the buttons in the [Profile library] tab are reduced and
no changes can be made in the [Profiles] window.
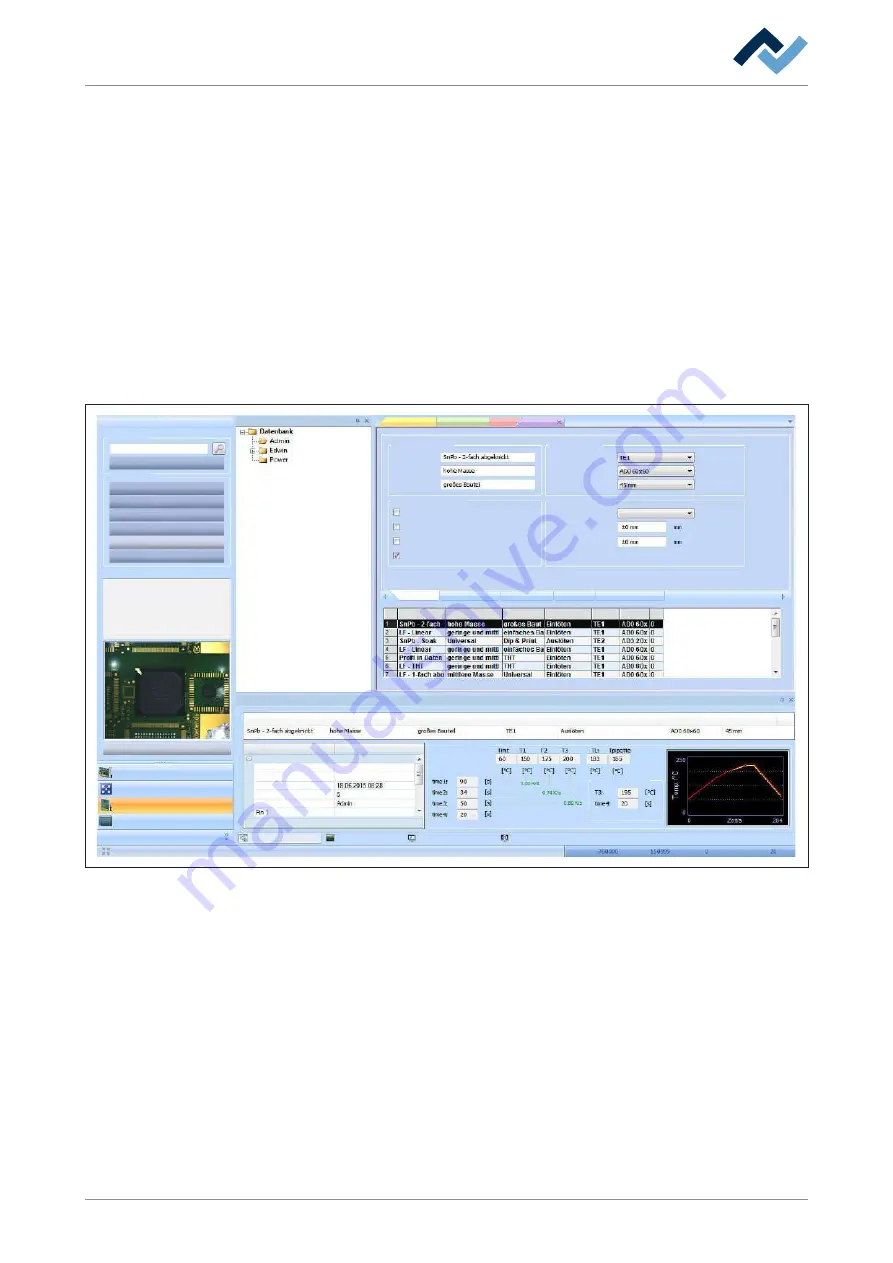
b) Enable the [Common settings] tab.
Profile name
Board
Component
Automation
Sensor
Adaptor
(head)
Common
settings
Profile settings
Configuration
Placement
Image and document
Show process instructions
Bottom left
Specifications
Sensor
Adaptor (head)
Head position
PCB positioning
Board Pos. X:
Board Pos. Y:
Profile definitions
Profile name
Board
Library
Soldering
Placement
Profile library
Archive
Save target position
Actual parameters
Data table
System settings
System info
X-Axis
Y-Axis
Z-Axis
Angle of rotation
Profile parameters
Value
Parameters
Profile
Document name
Tracking ID
Profile ID
Recording date
User
Profile printout
29.11.2014 12:47
Bottom left
Board
Profile
Component
Sensor
Automation
Adaptor (head)
Head position
Profile library
Online-HR 600
Current image
Archive
Profiles
Actual parameters
Search for profiles
Show template profiles
Add
Delete
Search for duplicates
Overwrite
Reset calibration value
Activate
Profile parameters
Search term
Desoldering parameters
Component
Desoldering
Placement
Soldering
Inspection
Pin 1 orientation
Profile automation
Fig. 57:
Profile, enabled [General] tab
c) In the [Library] click on the directory that contains the profile.
d) Select a profile in the profile table.
e) Click on the [Profile parameters] button in the [Activate] frame.
ð
The profile has been selected.
a) Click on the [Activate] button.
ð
The profile is active. You can now work with the profile.
6.5.3.2.3 Select the type of component and set it ready
a) Position the component in the middle of the glass plate after properly aligning
it.
Ersa GmbH
3BA00207_01 Operating Instructions HR 600_2 | Rev. 3
134 / 169


