J4350 and J6350 Services Router Getting Started Guide
the router is disconnected from earth ground. For more information about
ESD, see “Preventing Electrostatic Discharge Damage” on page 205.
2.
Press and release the power button to power off the Services Router. Wait for
the
POWER
LED to turn off.
3.
Ensure that the voltage across the DC power source cable leads is 0 V and that
the cable leads cannot become active during installation.
CAUTION:
There is no standard color coding for DC power cables. The color coding
used by the external DC power source at your site determines the color coding
for the leads on the power cables that attach to the terminal studs on each power
supply. You must ensure that power connections maintain the proper polarity. The
power source cables might be labeled
(+)
and
(–)
to indicate their polarity.
4.
Remove the power cables from the DC power source.
5.
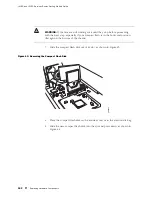
Use a Phillips screwdriver to remove the clear plastic cover protecting the
terminal block.
6.
Within the terminal block, remove the screws that fasten the power cable
lugs to the terminal block.
7.
Carefully move the power cables out of the way.
8.
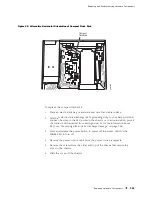
Slide the ejector tab on the power supply faceplate to the right, and hold it in
place to unlock the power supply.
9.
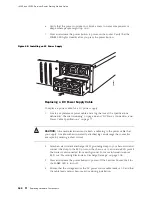
Grasp the handle on the power supply faceplate, and pull firmly to start
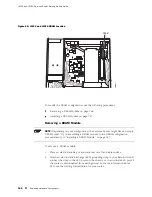
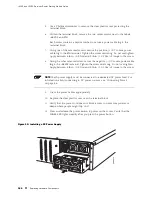
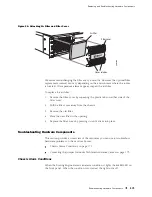
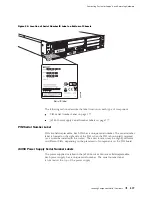
removing the power supply. Slide it halfway out of the chassis (see Figure 49).
10.
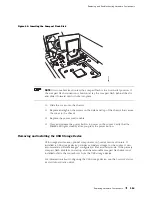
Place one hand underneath the power supply to support it, and slide it
completely out of the chassis.
11.
If you are not reinstalling a power supply into the emptied slot, install a blank
power supply panel over the slot.
164
Replacing Hardware Components
Summary of Contents for J4350
Page 14: ...J4350 and J6350 Services Router Getting Started Guide xiv Table of Contents...
Page 22: ...2 J series Overview...
Page 68: ...J4350 and J6350 Services Router Getting Started Guide 48 Field Replaceable PIMs...
Page 75: ...Services Router User Interface Overview Figure 25 J Web Layout Using the J Web Interface 55...
Page 88: ...J4350 and J6350 Services Router Getting Started Guide 68 Using the Command Line Interface...
Page 90: ...70 Installing a Services Router...
Page 100: ...J4350 and J6350 Services Router Getting Started Guide 80 Site Preparation Checklist...
Page 112: ...J4350 and J6350 Services Router Getting Started Guide 92 Powering a Services Router On and Off...
Page 144: ...J4350 and J6350 Services Router Getting Started Guide 124 Verifying Secure Web Access...
Page 162: ...142 Maintaining Services Router Hardware...
Page 194: ...J4350 and J6350 Services Router Getting Started Guide 174 Troubleshooting Hardware Components...
Page 204: ...184 J series Requirements and Specifications...
Page 220: ...J4350 and J6350 Services Router Getting Started Guide 200 ISDN RJ 45 Connector Pinout...
Page 267: ...Part 5 Index Index 247...
Page 268: ...248 Index...


