J4350 and J6350 Services Router Getting Started Guide
NOTE:
For a list of supported USB storage devices, see the
J-series Services Router
Release Notes
at
http://www.juniper.net
.
To remove and install a USB storage device, perform the following procedures:
Removing the USB Storage Device on page 154
Installing the USB Storage Device on page 155
Removing the USB Storage Device
NOTE:
Depending on your configuration, the Services Router might not have a USB
storage device. If no USB storage device is installed, proceed directly to the next
section, “Installing the USB Storage Device” on page 155.
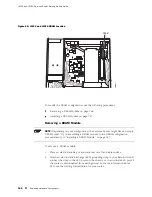
The USB storage device is installed into the USB port on the front panel of
the Services Router. To remove the USB storage device:
1.
Place an electrostatic bag or antistatic mat on a flat, stable surface.
2.
Attach an electrostatic discharge (ESD) grounding strap to your bare wrist and
connect the strap to the ESD point on the chassis, or to an outside ESD point if
the router is disconnected from earth ground. For more information about
ESD, see “Preventing Electrostatic Discharge Damage” on page 205.
3.
Verify that the router did not boot from the USB storage device by issuing the
show system storage
command from the CLI. For example:
user@host> show system storage
Filesystem
512-blocks
Used
Avail Capacity Mounted on
/dev/ad0s1a
218254
175546
40526
81%
/
...
The boot device is mounted on
/
. The primary compact flash disk is located at
ad0
. The USB storage device is located at
da0
. This example shows that the
router booted from the primary compact flash disk.
4.
If the
show system storage
output indicates that the router booted from the USB
storage device, press and release the power button to power off the router.
Wait for the
POWER
LED to turn off before you remove the USB storage device.
5.
Gently grasp the USB storage device and slide it out of the USB port.
6.
Place the USB storage device on the antistatic mat or in the electrostatic bag.
154
Replacing Hardware Components
Summary of Contents for J4350
Page 14: ...J4350 and J6350 Services Router Getting Started Guide xiv Table of Contents...
Page 22: ...2 J series Overview...
Page 68: ...J4350 and J6350 Services Router Getting Started Guide 48 Field Replaceable PIMs...
Page 75: ...Services Router User Interface Overview Figure 25 J Web Layout Using the J Web Interface 55...
Page 88: ...J4350 and J6350 Services Router Getting Started Guide 68 Using the Command Line Interface...
Page 90: ...70 Installing a Services Router...
Page 100: ...J4350 and J6350 Services Router Getting Started Guide 80 Site Preparation Checklist...
Page 112: ...J4350 and J6350 Services Router Getting Started Guide 92 Powering a Services Router On and Off...
Page 144: ...J4350 and J6350 Services Router Getting Started Guide 124 Verifying Secure Web Access...
Page 162: ...142 Maintaining Services Router Hardware...
Page 194: ...J4350 and J6350 Services Router Getting Started Guide 174 Troubleshooting Hardware Components...
Page 204: ...184 J series Requirements and Specifications...
Page 220: ...J4350 and J6350 Services Router Getting Started Guide 200 ISDN RJ 45 Connector Pinout...
Page 267: ...Part 5 Index Index 247...
Page 268: ...248 Index...


