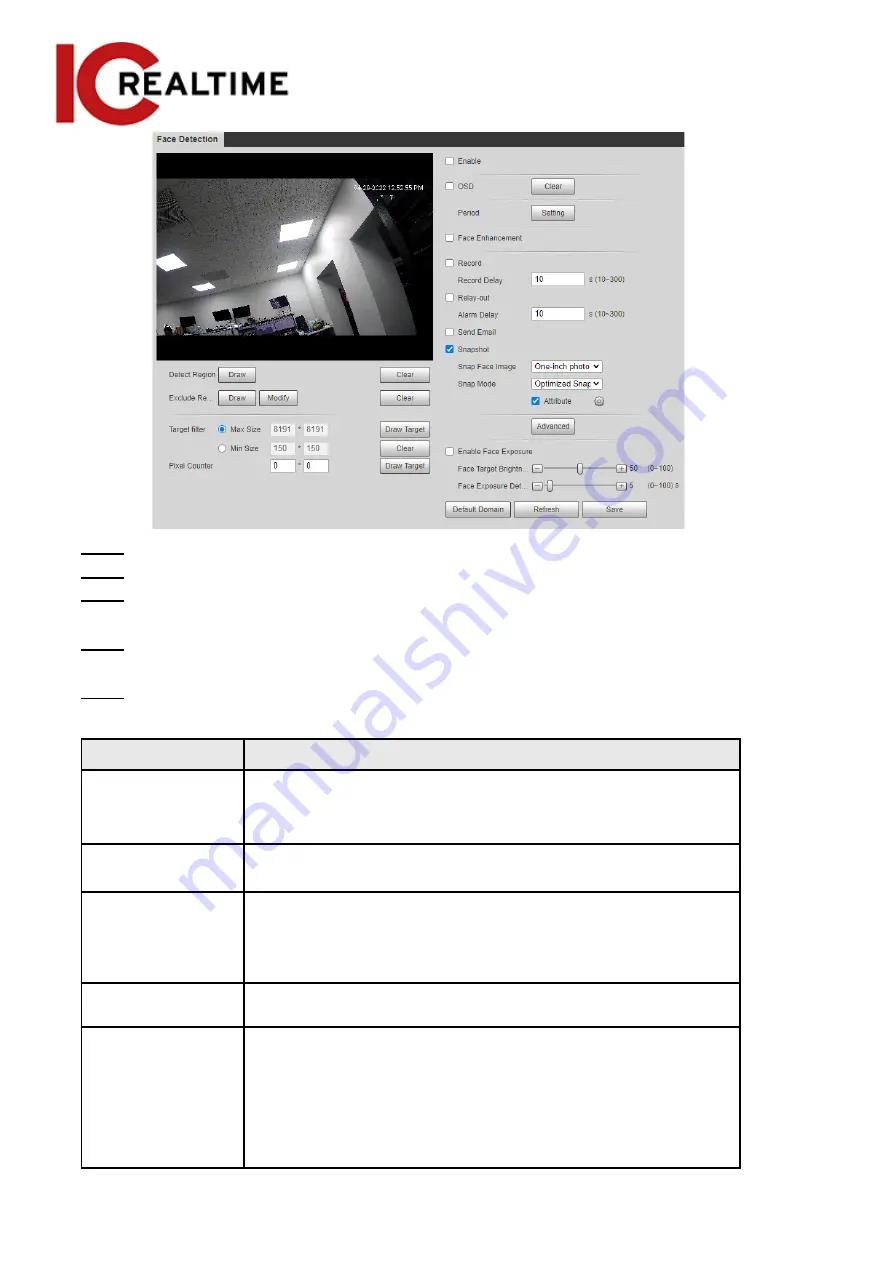
Step 2
Select the
Enable
checkbox to enable the face detection function.
Step 3
(Optional) Click
Draw
next to
Detect Region
to draw a face detection area in the image.
Step 4
(Optional) Click
Draw
next to
Exclude Region
, and then draw an area that will exclude
face detection in the image.
Step 5
(Optional) Select
Max Size
or
Min Size
, click
Draw Target
at the right side of
Target filter
,
and then draw the target in the image.
Step 6
Set parameters.
Table 5-15 Description of face detection parameters
Parameter
Description
OSD
Toggles statistics in OSD. The number people with face detected
and recognized will be displayed on the
Live
interface.
Click
Reset
to reset the statistics.
Face Enhancement
Optimizes faces in low bit rate streams.
Target Box Overlay
Select the
Non-living Filtering
checkbox to add a target box to the
face in the captured picture to highlight the face.
The captured face picture is saved in an SD card. Click the
Snap
Face Image
tab to view the captured picture.
Non-living Filtering
Filters objects that may have a face but are not recognized as a
living being. (such as posters with faces on them)
Set a range for snapping face image, including face picture,
one-inch picture, and custom.
When selecting
Custom
, click
Setting
, configure the parameters on
the prompt interface, and then click
OK
.
●
Customized width: Set snapshot width; enter a value for
the face width. It ranges from 1–5.
161


