5-29
5
COMMON SETTING
1
2
3
4
5
6
7
8
9
10
11
12
13
14
15
16
17
18
19
20
21
Attaching a picture:
1) Rotate [DIAL] to select the camera icon,
and then push [ENTER] to open the picture
select window.
2) Select the desired picture, and then push [ENTER].
• When the memo is recalled, the picutre is reloaded from
the USB memory stick.
Note:
• The picture must be stored in the
“\MarineCommander\Picture” folder in the USB memory.
• The picture format must be JPG, BMP or PNG.
• The picture name, not including the extention,
must be 8 characters or less.
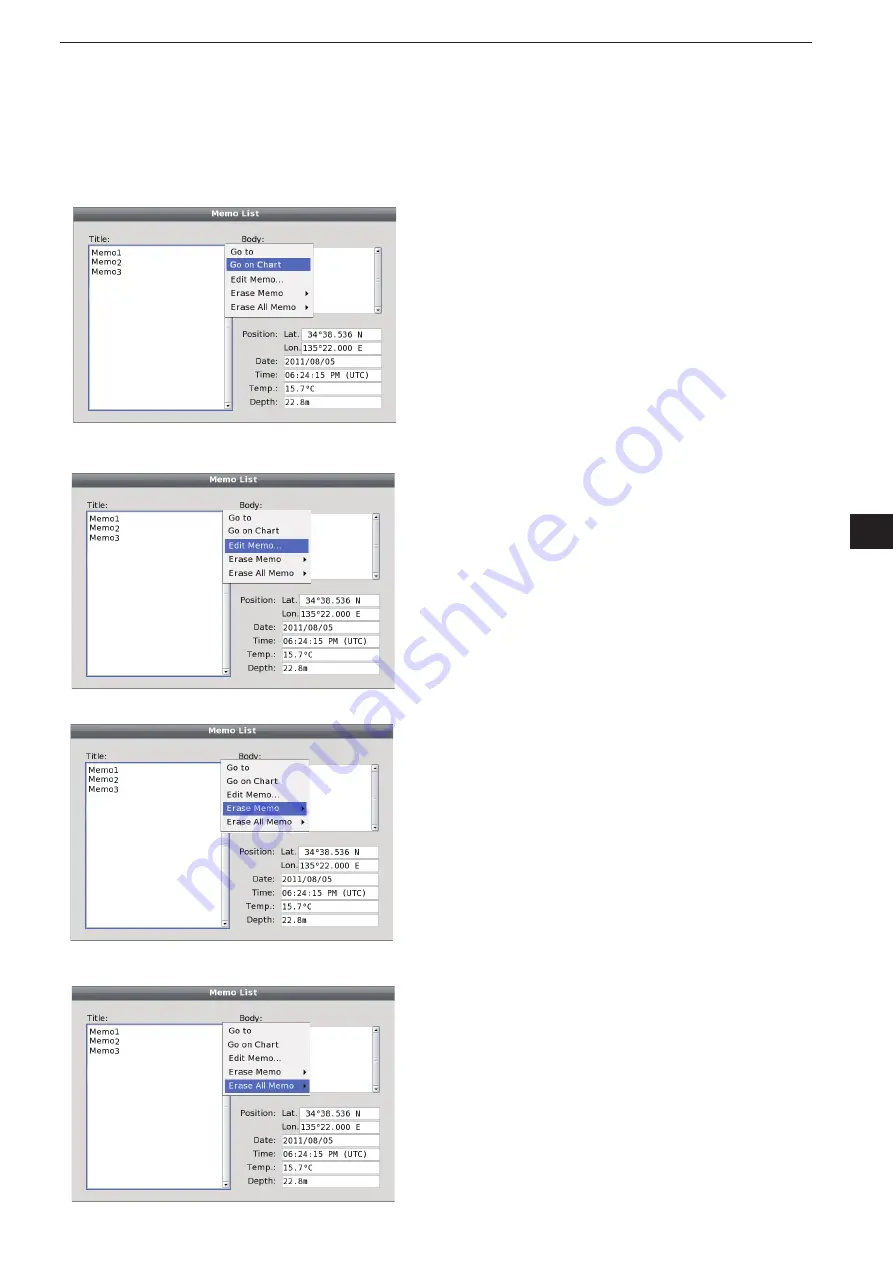
• Memo List––Go on Chart (For plotter operation)
This function enables the cursor to move to the se
-
lected Memo on the plotter display.
q
When the Memo List is displayed, rotate [DIAL]
until the desired memo is highlighted, and then
push [SUB]
to display the Memo Sub Menu screen.
w
Rotate [DIAL] until the “Go on Chart” menu is
highlighted, and then push [ENTER].
• The Memo Sub Menu screen disappears, and the
cursor automatically moves to the selected Memo.
• Memo List––Edit Memo...
<Memo list screen–Go on Chart>
<Memo list screen–Edit Memo...>
<Memo list screen–Erase Memo...>
<Memo list screen–Erase All Memo...>
The memo can be edit on the Memo List.
q
When the Memo List is displayed, rotate [DIAL]
until the desired memo is highlighted, and then
push [SUB]
to display the Memo Sub Menu screen.
w
Rotate [DIAL] until the “Edit Memo...” menu is
highlighted, and then push [ENTER].
• The Memo edit window appears. (p. 5-28)
• Memo List––Erase Memo
The memo can be removed from the list.
q
When the Memo List is displayed, rotate [DIAL]
until the desired memo is highlighted, and then
push [SUB]
to display the Memo Sub Menu screen.
w
Rotate [DIAL] until the “Erase Memo” menu
is highlighted, and then select "OK" and push
[ENTER].
• The selected memo is cleared.
• Memo List––Erase All Memo
The listed memos can be collectively removed from
the list.
q
When the Memo List is displayed, rotate [DIAL]
until the desired memo is highlighted, and then
push [SUB]
to display the Memo Sub Menu screen.
w
Rotate [DIAL] until the “Erase All Memo” menu
is highlighted, and then select "OK" and push
[ENTER].
• The listed memos are all cleared.
Summary of Contents for MarineComander MXS-5000
Page 1: ...INSTRUCTION MANUAL MARINECOMMANDER SYSTEM MXS 5000 ...
Page 146: ......
Page 192: ...MEMO ...
Page 193: ...MEMO ...


