


56
Ch.2 Site Server
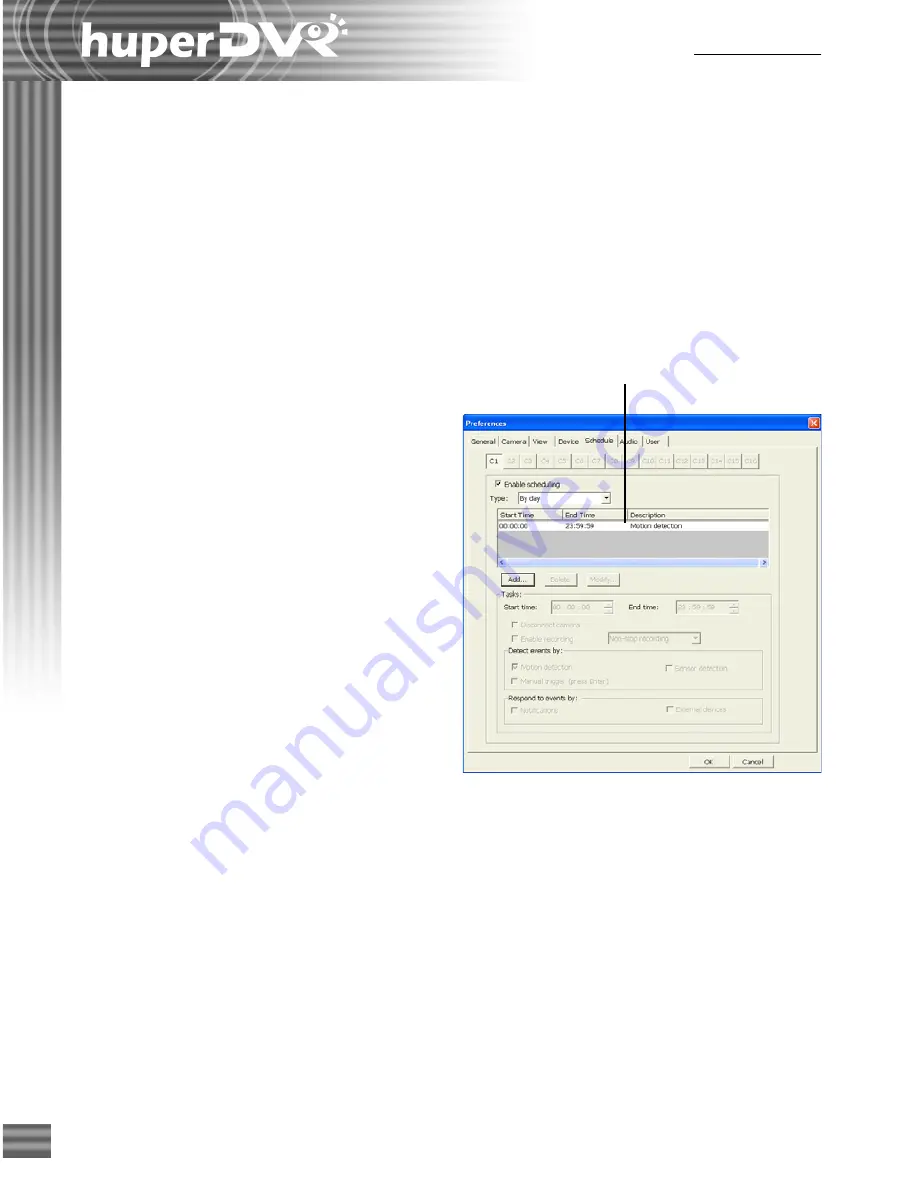
Schedule list
Timed surveillance settings (Schedule tab)
Click the
Schedule
tab in the Preferences dialog box to set up a surveillance schedule for each
video camera. Timed surveillance can be scheduled in a daily, weekly, or monthly basis.
By Day
To set up a daily surveillance schedule for
each video camera:
1. Choose a video camera by clicking the
number button that corresponds to that
camera.
2. Select the "
Enable scheduling
" option.
3. From the "
Type
" drop-down list, select
"
By Day
".
4. To add a new schedule, click "
Add
".
5. In the dialog box that opens, set a time
schedule for monitoring the camera and
select the checkboxes of tasks to be
performed within the scheduled time.
(See next page for more details.)
6. Repeat steps 1 to 5 to add more
schedules.
7. All created time schedules will be added
to the schedule list in the
Schedule
tab.
To select a schedule and view details,
click its "
Start Time
" entry.
To delete a schedule, select it and click
the
Delete
button.
To modify a schedule, select it and then
click the
Modify
button.
8. Repeat steps 1 to 7 to create daily
schedules for other video cameras.
Note
: Time segments that are not listed
in the
Schedule list
will use the options
set in the
Preference - Camera Tab
.
Summary of Contents for huberDVR 2400
Page 146: ...146 Appendix Output wiring Diagram NC Normal Close setting NO Normal Open setting...
Page 161: ...161 DVR Using RS232 Com Port Connect to RS232 Port DVR using COM Port...
Page 165: ...165 Input Output Pin...
Page 182: ...182 Appendix Input Output Pin...
Page 213: ...213 Step 4 Connect RS232 cable from the RS 232 port of converter device to the computer...
Page 216: ...216 Appendix huperRemote Manual...