


20
Ch.2 Site Server
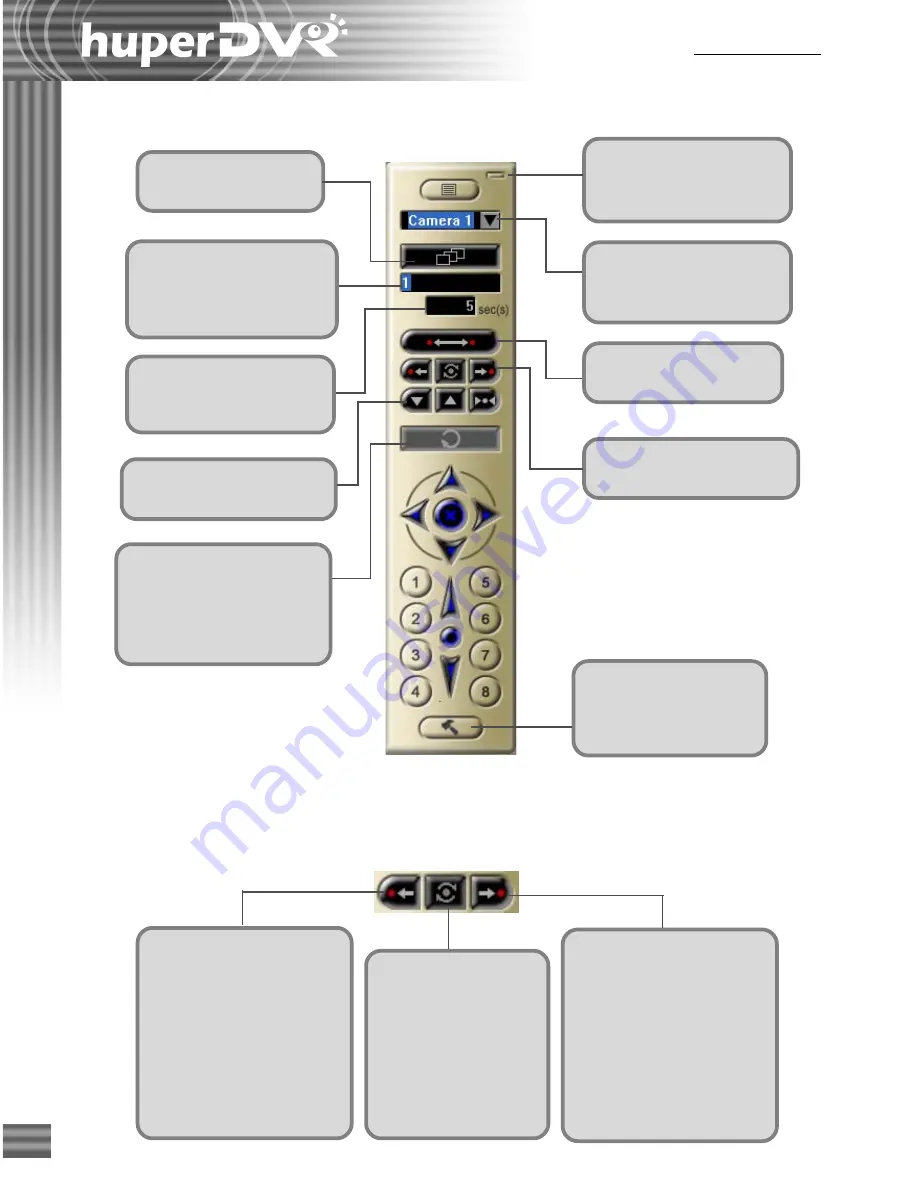
Click this button to close
the PTZ Camera Control
Panel.
Click here to enable
or disable auto-loop.
Enter the position numbers
of the PTZ cameras to be
looped (separated by a
comma).
Enter the pause duration
(in number of seconds) for
displaying each position.
These are the Auto-Pan
Position controls.
Click this button to reset
the hardware settings of the
PTZ camera. (Not all PTZ
camera devices support the
reset function.)
Set Left Position:
Adjust the camera angle,
then click this button and
hold for 2 seconds to set it
as the left pan position. Or,
right-click the button to
specify a name and set the
current camera angle for the
preset.
Switch Left and
Right:
Auto-pan has two
navigation tours along
different sides of the
circumference. Click
this button to switch
between one another.
Set Right Position:
Adjust the camera angle,
then click this button and
hold for 2 seconds to set it
as the right pan position.
Or, right-click the button
to specify a name and set
the current camera angle for
the preset.
Auto
Auto-Pan Position controls
Use these buttons to set the two camera positions for auto-panning.
Click this button to
open the Settings dialog
box. (See page 22 to 25
for details).
Click here to select a PTZ
camera that you want to
customize.
Click here to enable or
disable auto-panning.
These are the Auto-Pan
Speed controls.
Summary of Contents for huberDVR 2400
Page 146: ...146 Appendix Output wiring Diagram NC Normal Close setting NO Normal Open setting...
Page 161: ...161 DVR Using RS232 Com Port Connect to RS232 Port DVR using COM Port...
Page 165: ...165 Input Output Pin...
Page 182: ...182 Appendix Input Output Pin...
Page 213: ...213 Step 4 Connect RS232 cable from the RS 232 port of converter device to the computer...
Page 216: ...216 Appendix huperRemote Manual...