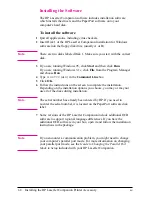
Installing the Software
The HP LaserJet Companion software includes installation software
which installs the drivers and the PaperPort software onto your
computer’s hard disk.
To install the software
1
Quit all applications, including virus checkers.
2
Insert Disk 1 of the HP LaserJet Companion Installation for Windows
software into the floppy disk drive (usually A or B).
N o t e
There are two disks labeled Disk 1. Make sure you start with the correct
disk.
3
If you are running Windows 95, click Start and then click Run.
If you are running Windows 3.1x, click File from the Program Manager
and choose Run.
4
Type
A:SETUP
(or
B
) in the Command Line box.
5
Click OK.
6
Follow the instructions on the screen to complete the installation.
Depending on the installation options you choose, you may or may not
use all of the disks during installation.
N o t e
The serial number has already been entered by HP. If you need to
re-enter the serial number, it is located on the PaperPort software disk
label.
7
Some versions of the HP LaserJet Companion include additional OCR
software to support regional language differences. If you have the
additional OCR software in your box, open it and follow the installation
instructions in the package.
N o t e
If you encounter a communication problem, you might need to change
your computer’s parallel port mode. For more information on changing
your parallel port mode, see the Guide to Changing the Parallel Port
Mode in Setup included with your HP LaserJet Companion.
1-8
Installing the HP LaserJet Companion Printer Accessory
EN

