


REV0 10.02.15
-H8-36-
■
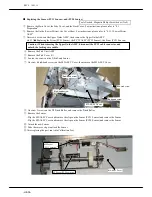
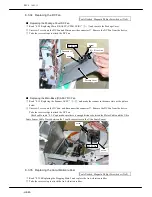
Replacing the Prism
Replacing the Prism
Replacing the Prism
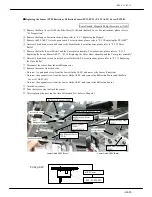
Replacing the Prism(
((
(PC41
PC41
PC41
PC41)
))
)
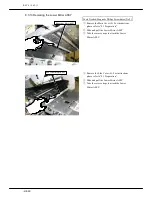
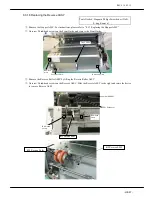
Tools Needed: Magnetic Philips Screwdriver (No.2)
①
Remove the Main Cover (L)(R). For instructions, please refer to “8.1 Preparation”
②
Unscrew 4 bind-head screws attached to the Eject Guide ASSY, and remove the Eject Guide ASSY. For
instructions, please refer to “8.3.5 Replacing the Scanner ASSY”
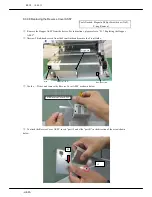
③
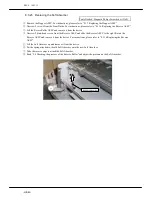
Unscrew 2 washer faced head screws
④
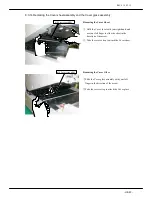
Unscrew 1 hexagonal washer faced head screw attached on the Prism (PC41 Sensor)
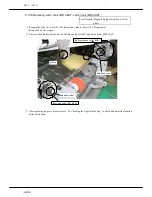
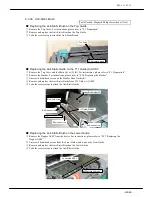
⑤
Replace it with a new Prism (PC41 Sensor)
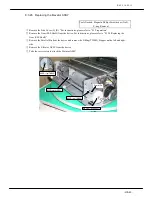
⑥
Take the reverse steps to attach the Prism
⑦
After replacing the part, run Auto Calibration Test
hexagonal washer
Pinch Roller ASSY
Eject Guide ASSY
Washer faced
Heads screw
#57 Prism (PC41)
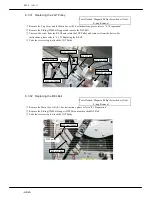
■
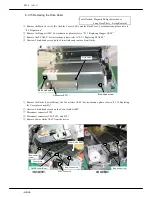
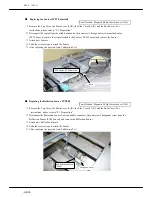
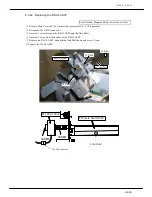
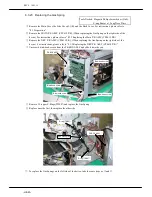
Replacing the Sensor (PC51 Emission)
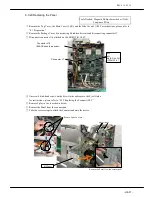
Tools Needed: Magnetic Philips Screwdriver (No.2)
①
Remove the R Stacker. For instructions, please refer to “8.3.8 Replacing the Stacker”
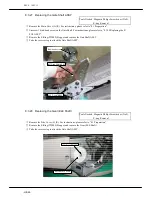
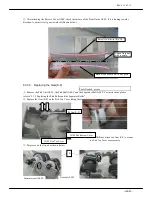
②
Unscrew 1 hexagonal washer faced head screw attached to the Sensor (PC51), and disconnect the connector
from the Sensor (PC51 Sensor) and remove the Sensor (PC51 Sensor)
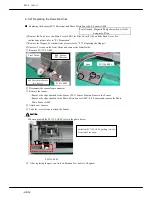
③
Replace it with a new Sensor (PC51 Sensor)
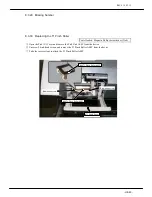
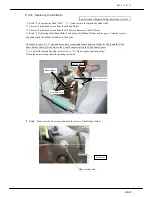
④
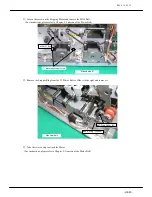
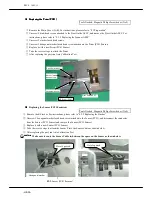
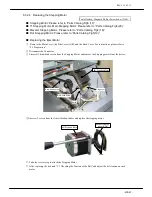
Take the reverse steps to attach the Sensor. Place the Sensor Cable as shown below.
⑤
After replacing the part, run Auto Calibration Test
Make sure to route the Sensor Cable in-between the space on the Sensor as shown below.
#55
Sensor (PC51 Emission)
Hexagonal washer
Here is passed.
Here is passed.
CAUTION
CAUTION
CAUTION
CAUTION
Summary of Contents for HT-4139-28
Page 1: ...HT 4139 28 48 Scanner Maintenance Manual ...
Page 2: ......
Page 11: ... H2 5 2 5 Block Diagram ...
Page 22: ...REV0 10 02 15 H3 10 Lens Mirror Motor Mirror No 1 Mirror No 3 Mirror No 2 ...
Page 35: ...REV0 10 02 15 H7 2 ...
Page 63: ...REV0 2010 02 15 H7 30 ...
Page 89: ...REV0 10 02 15 H8 26 ...


