


REV0 10.02.15
-H8-20-
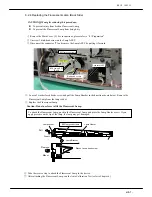
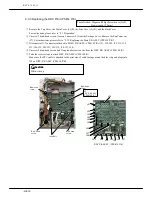
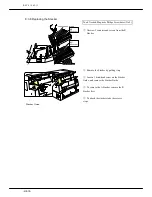
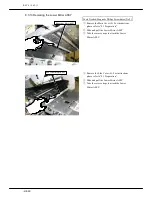
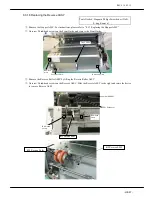
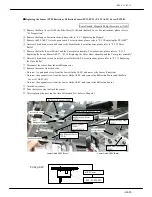
8.3.10 Replacing the Scanner ASSY
Tools Needed: Magnetic Philips Screwdriver (No.2)
①
Remove the Side Cover (L) (R). For instructions, please refer to “8.1 Preparation”
②
Remove the PS
-
ASSY. For instructions, please refer to “8.3.1 Replacing the PS ASSY (electric power
unit)”
③
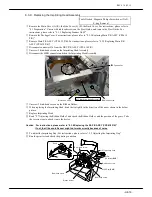
Remove the Lamp ASSY (Back). For instructions, please refer to “8.2.4 Replacing the Fluorescent Lamp
(Back)”
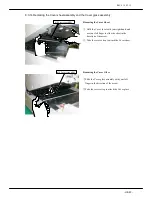
④
Remove the Cover glass assembly. For instructions, please refer to “8.3.14 Replacing the Cover sheet
assembly and the Cover glass assembly”
⑤
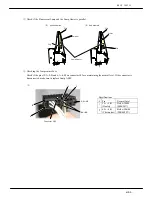
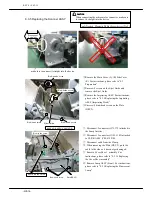
Unscrew 3 bind-head screws on the Scanner ASSY
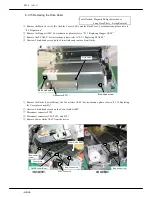
⑥
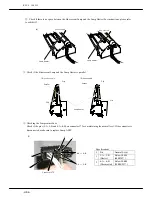
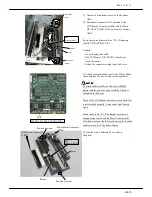
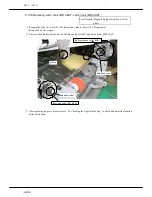
Pull the Scanner ASSY and disconnect the CCD Sensor Connector (J40B) and the Mirror Motor
connector from the Scanner ASSY.
・
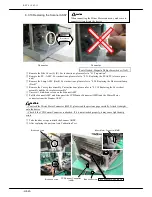
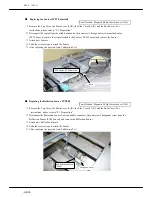
To attach the Mirror Motor Connector (MMF), please read the previous page carefully. Attach it straight
onto the device
・
Check if the CCB Sensor Connector is attached. If it is not attached properly, it may cause light density
errors
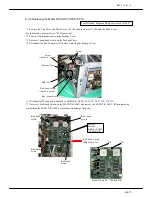
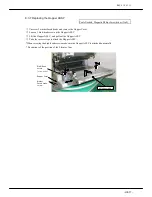
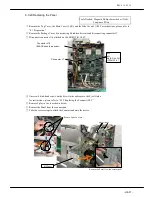
⑦
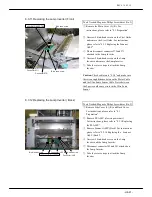
Take the above steps to attach the Scanner ABBY.
⑧
After replacing the part, run Auto Calibration Test
#22 Scanner ASSY(Back)
Bind he ad sc rew
Bind head scre w
Bind h ead screw
CCD Sensor Connec tor
(
J40B
)
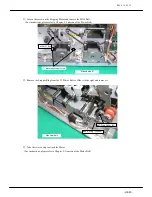
Mirror Motor Connector(MMR)
真直ぐに挿抜
CAUTION
CAUTION
CAUTION
CAUTION
When connecting the Mirror Motor connector, make sure to
connect it straight into the device
CAUTION
CAUTION
CAUTION
CAUTION
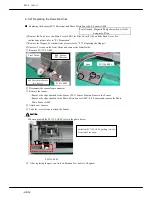
Connector
Connector
Disconnect
it straight
Summary of Contents for HT-4139-28
Page 1: ...HT 4139 28 48 Scanner Maintenance Manual ...
Page 2: ......
Page 11: ... H2 5 2 5 Block Diagram ...
Page 22: ...REV0 10 02 15 H3 10 Lens Mirror Motor Mirror No 1 Mirror No 3 Mirror No 2 ...
Page 35: ...REV0 10 02 15 H7 2 ...
Page 63: ...REV0 2010 02 15 H7 30 ...
Page 89: ...REV0 10 02 15 H8 26 ...


