GE H
EALTHCARE
D
IRECTION
5158821-100, R
EVISION
3
E
X
PLORE
L
OCUS
SP S
ERVICE
G
UIDE
Page 103
4.
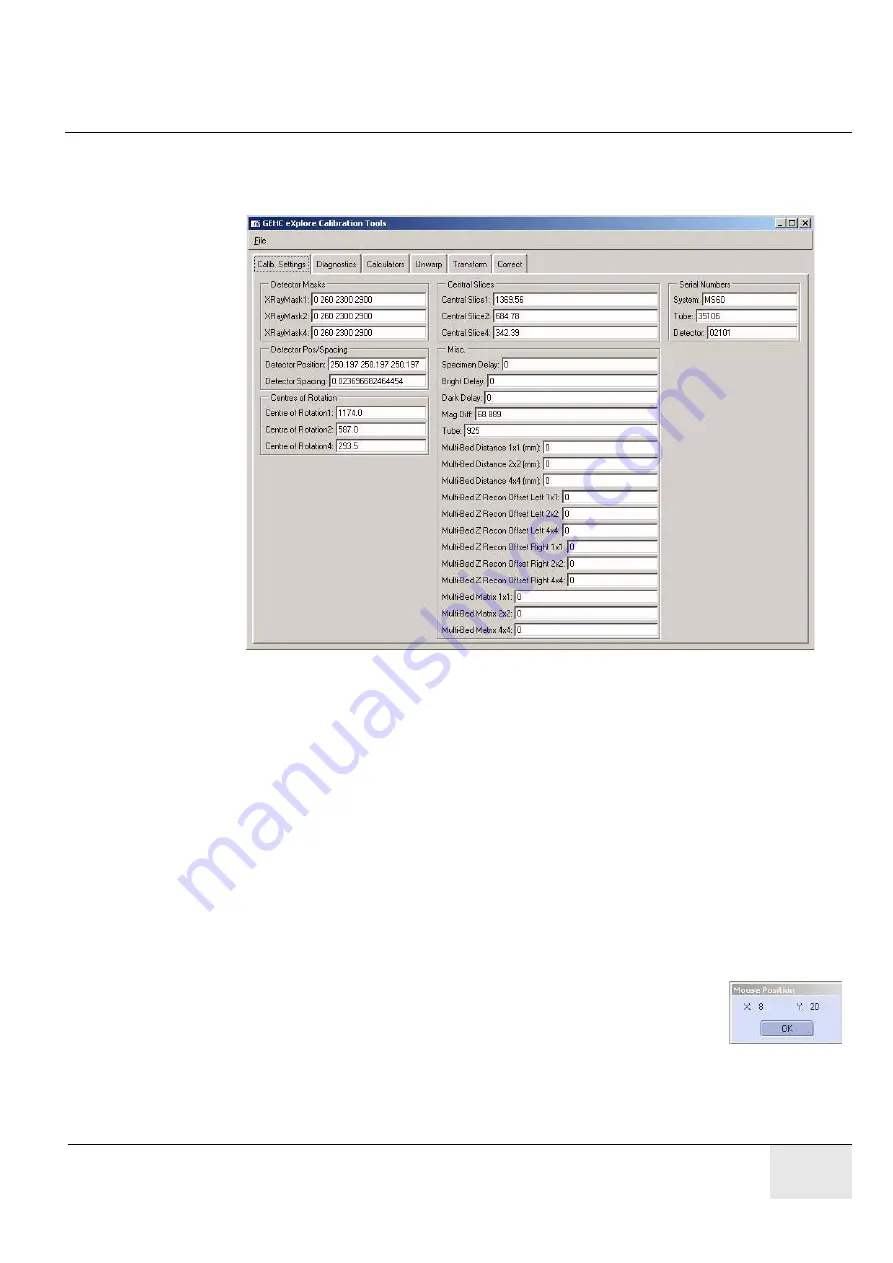
Open the
Calibration Tools
program, click
OK
when the warning pop-up is displayed, then
choose the
Calib. Settings
tab.
Calibration Tools
is located in C:\Program Files\GE Medical
Systems\eXplore Utilities\Calibration\.
5.
Click
File
and choose
Read Registry Values
from the drop-down menu.
6.
Change the values in the XRayMask1, XRayMask2, and XRayMask4 fields to:
0 0 2300 3500
(be sure to include the spaces)
7.
Click
File
and choose
Write Registry Values
from the drop-down menu.
When prompted for a password, enter:
EvS8899
8.
Ensure the X-Ray switch on the unit is ON and the red Reset button is not lit.
9.
Click the
Start Shutter
button on the
X-Ray and Motor Controller
screen.
10. Click the
Turn X-Ray On
button.
11. Click the
Fluoro
button, then:
-
select
OK
when the warning pop-up appears.
-
select
OK
when the text concerning placement of the specimen appears.
12. Press
m
in
Fluoro
to display the mouse position window.
The usable area of the detector appears as the grey area in
Fluoro
- it is
usually bounded by black borders at the top and bottom of the screen
(unusable area).
The objective is to determine the coordinates of the largest rectangle possible within the grey area
of the screen that encompasses 11 x 14 bebes.
Summary of Contents for Healthcare eXplore Locus SP
Page 2: ...This page is intentionally left blank...
Page 12: ...GE HEALTHCARE DIRECTION 5158821 100 REVISION 3 EXPLORE LOCUS SP SERVICE GUIDE Page 12...
Page 13: ...GE HEALTHCARE DIRECTION 5158821 100 REVISION 3 EXPLORE LOCUS SP SERVICE GUIDE Page13...
Page 37: ...GE HEALTHCARE DIRECTION 5158821 100 REVISION 3 EXPLORE LOCUS SP SERVICE GUIDE Page37...
Page 228: ...GE HEALTHCARE DIRECTION 5158821 100 REVISION 3 EXPLORE LOCUS SP SERVICE GUIDE Page 228...


