2. PLOTTER
2-6
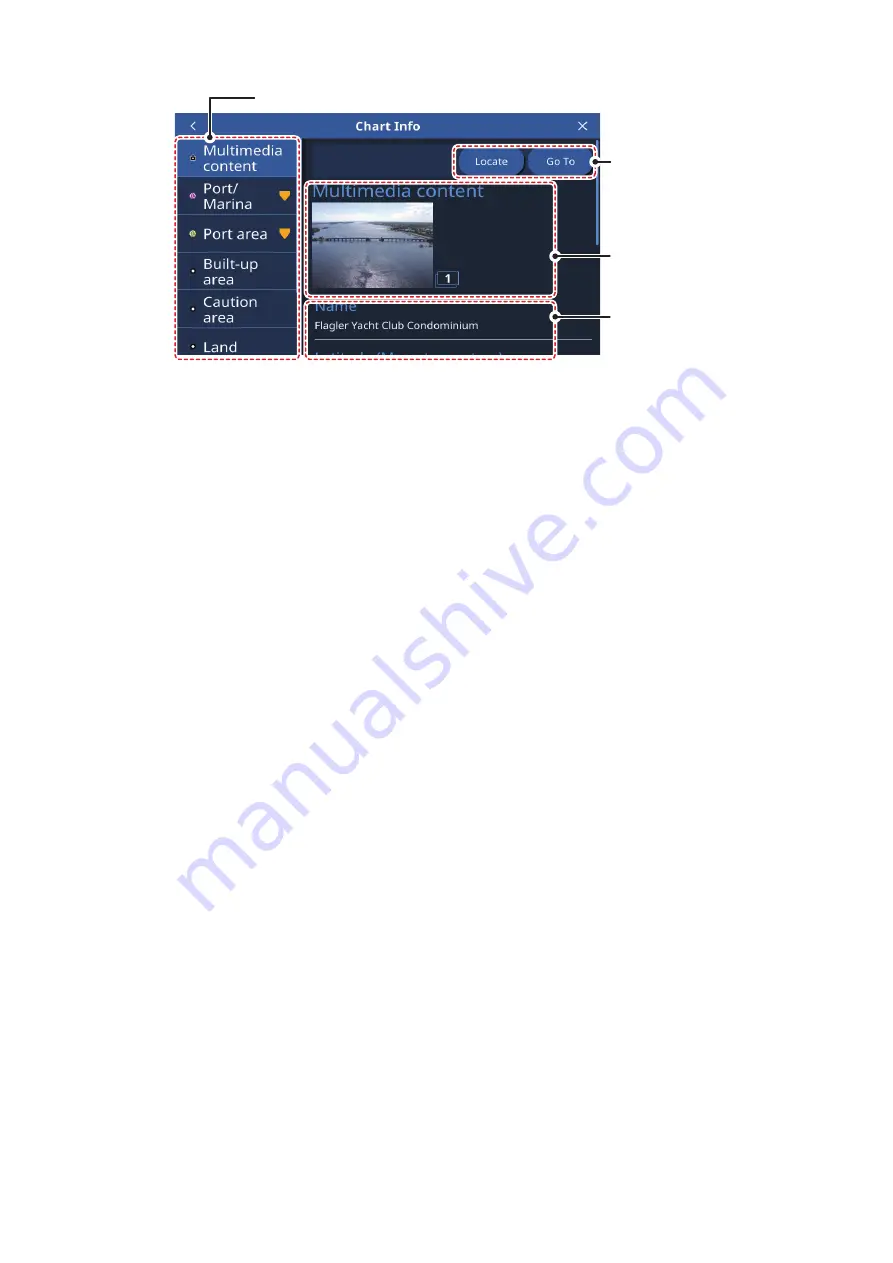
The related chart objected listed, available actions, photos and detailed information
vary depending on the location selected. The following list shows the actions which
may be available.
• [Locate]: Locates the selected object on the chart and places the object at the cen-
ter of the screen.
• [Go To]: Sets the selected object as the destination and starts a new route.
• [Forecast]: Shows the weather forecast for the area near the selected object.
• [Graph]: Show the tide graph for the selected area.
• [Edit]: Edit the information for the selected item.
Multimedia content:
Depending on the chart object you select, an image (or several
images) of the area/location may appear. When multiple images are available, you
can tap the image to view a slide-show of the images. Multiple images are numbered
at the bottom-right of each image.
2.11
Radar Overlay
The radar overlay has the radar echo image overlaid on the plotter display (requires
connection to a radar sensor and heading sensor). To activate the radar overlay fea-
ture, swipe the bottom of the plotter screen upwards to show the layered menu, then
tap the [Radar Overlay] toggle box to show [ON]. To deactivate the overlay feature,
tap the [Radar Overlay] toggle box to show [OFF].
2.12
NAVpilot Operations
When a NAVpilot-700/300 series autopilot is connected to the GP-1x71F, you can op-
erate the following autopilot features from the GP-1x71F.
• Show the NAVpilot instruments display on the GP-1x71F. See chapter 9.
• Change the operation mode for the autopilot (Auto or NAV). See section 1.4.
2.12.1
How to show the autopilot’s course and destination on-screen
When an autopilot is connected to the GP-1x71F, you can show the autopilot’s course
and destination on the plotter screen.
Action
buttons
Detailed information
for selected object
or location
List of chart objects related to the selected location.
Multimedia content
(Shown only when
available.)


