2. PLOTTER
2-2
2.3
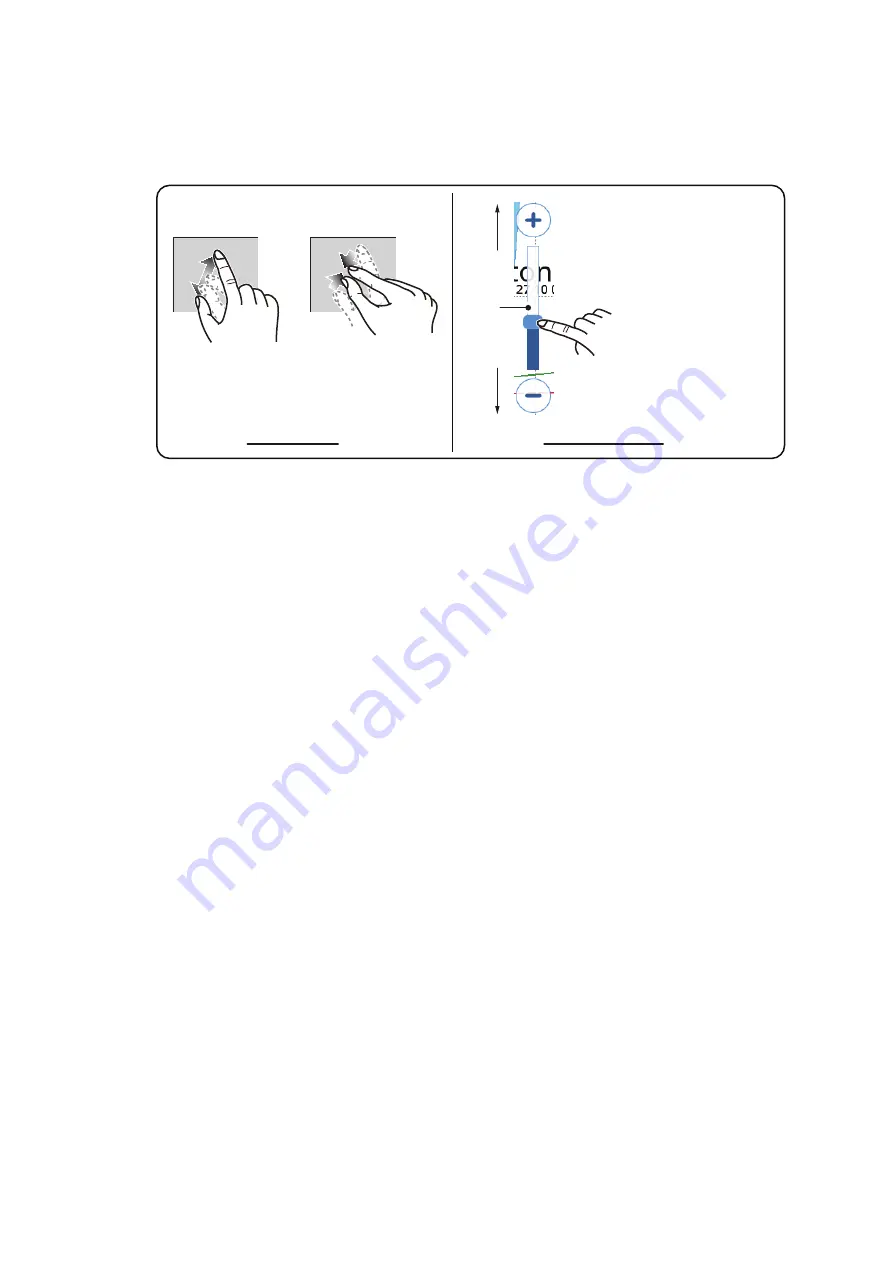
Changing the Display Range
There are two methods you can use to increase or decrease the display range. You
can use the range slider and buttons, or use the pinch motion on the touch screen.
2.4
Orientation Modes
You can display charts with North Up, Head Up or Course Up orientation. To change
the orientation mode, tap the orientation mode indication at the bottom-left of the
screen. You can also change the orientation from [Home] => [Settings] => [Ship and
Tracks] => [Ship] => [Presentation Mode].
Head Up:
Charts are oriented with the heading at the top of screen. The own ship icon
also points in the heading direction, while charts move/rotate in relation to the heading.
Course Up:
Charts are oriented with the course (destination) at the top of the screen.
This mode is useful when navigating a short voyage.
North Up:
Charts are oriented with North at the top of the screen and the own ship
icon moves/rotates in relation to the current heading and course. This mode is useful
for long voyages.
2.5
How to Move the Charts
You can move the charts to place points and view other areas which are not shown
on-screen. Drag the chart to show the area you want to view or place a point in.
2.6
Own Ship Icon Display Settings
The own ship icon shows where your ship is currently. Generally, the icon mirrors the
actual movements (turns) of the ship.
Pinch outwards
to zoom in
Zoom in
Zoom out
Pinch inwards
to zoom out
Tap the slider bar, drag
the slider, or tap the
[+]/[-] icons to zoom in
or out.
*: If the slide-bar is not displayed, tap [Home] =>
[Settings] => [Radar] => [General], then tap the
toggle box at [Show Range Slider] to show [ON].
Pinch method
Slide-bar method*
Slider
bar


