88
Upgrade and Maintenance Manual
TX140
S1
Basic hardware procedures
Ê
If required, install the rack mounting bracket and rack system into the rack
as described in the "Rack Mounting Kit - RMK-F2 Drop-In" Mounting
Instructions.
I
The printed poster is contained in the rack mounting kit.
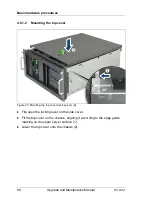
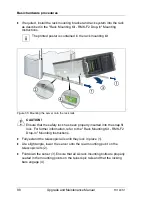
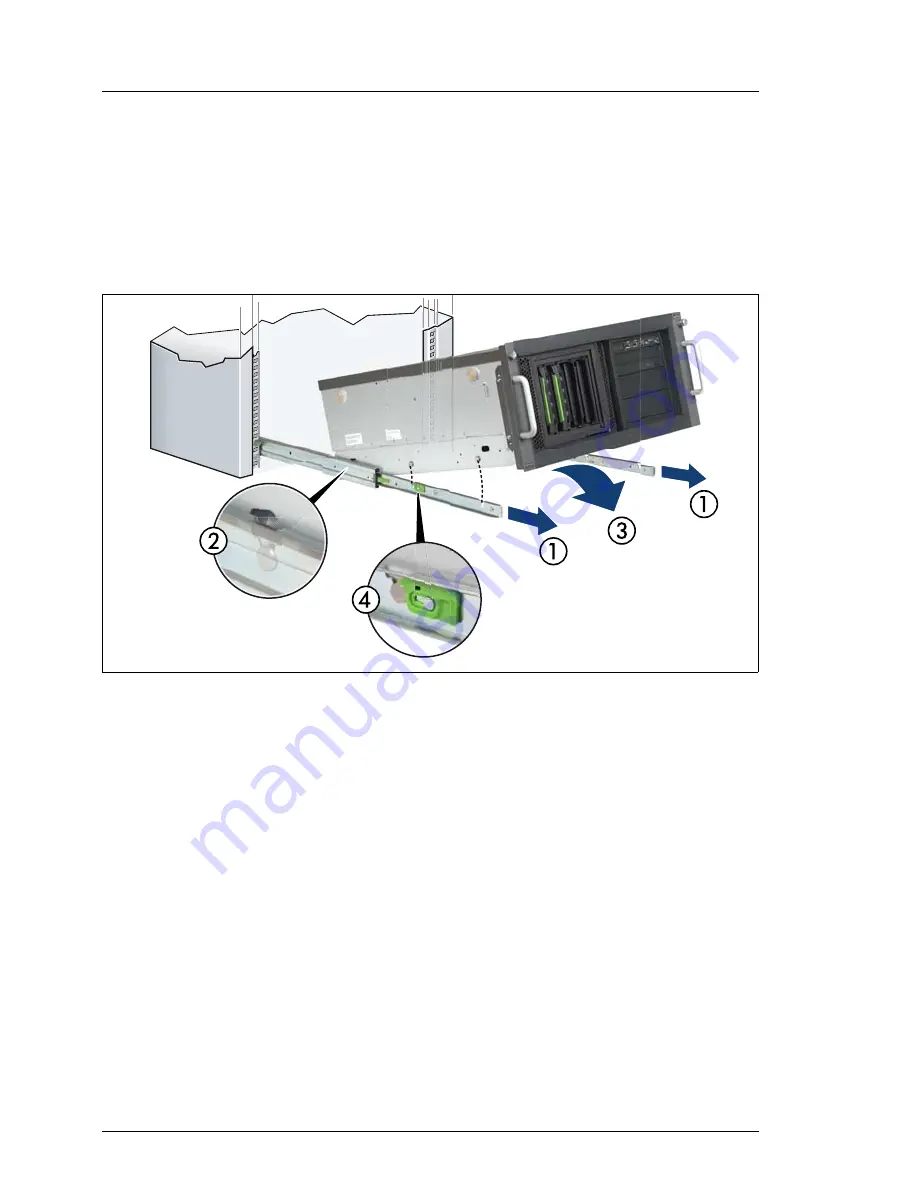
Figure 35: Mounting the server onto the rack rails
V
CAUTION!
Ensure that the safety lock has been properly inserted into the snap fit
lock. For further information, refer to the "Rack Mounting Kit - RMK-F2
Drop-In" Mounting Instructions.
Ê
Fully extend the telescopic rails until they lock in place (1).
Ê
At a slight angle, lower the server onto the rear mounting point on the
telescopic rails (2).
Ê
Fold down the server (3). Ensure that all six rack mounting bolts are properly
seated in the mounting points on the telescopic rails and that the locking
bars engage (4).
Summary of Contents for PRIMERGY TX140 S1
Page 6: ...Upgrade and Maintenance Manual TX140 S1 ...
Page 22: ...Upgrade and Maintenance Manual TX140 S1 Contents ...
Page 24: ...24 Upgrade and Maintenance Manual TX140 S1 ...
Page 40: ...40 Upgrade and Maintenance Manual TX140 S1 Before you start ...
Page 204: ...204 Upgrade and Maintenance Manual TX140 S1 Hard disk drives solid state drives ...
Page 292: ...292 Upgrade and Maintenance Manual TX140 S1 Expansion cards and backup units ...
Page 306: ...306 Upgrade and Maintenance Manual TX140 S1 Main memory ...
Page 370: ...370 Upgrade and Maintenance Manual TX140 S1 Accessible drives ...
Page 414: ...414 Upgrade and Maintenance Manual TX140 S1 Front panel and external connectors ...
Page 472: ...472 Upgrade and Maintenance Manual TX140 S1 System board and components ...
Page 568: ...568 Upgrade and Maintenance Manual TX140 S1 Cabling ...

