


446
Upgrade and Maintenance Manual
TX140
S1
System board and components
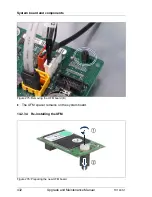
14.3.2.3 Removing the TPM board
Ê
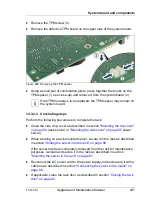
Remove the system board as described in section
"Removing the system
board" on page 455
.
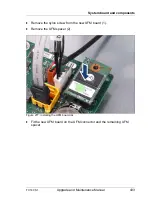
Ê
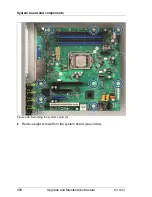
Lay the system board on a soft, antistatic surface with its component side
facing down.
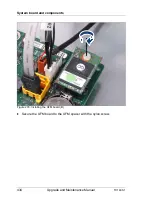
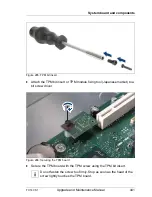
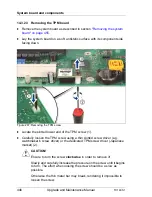
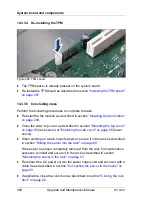
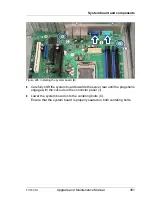
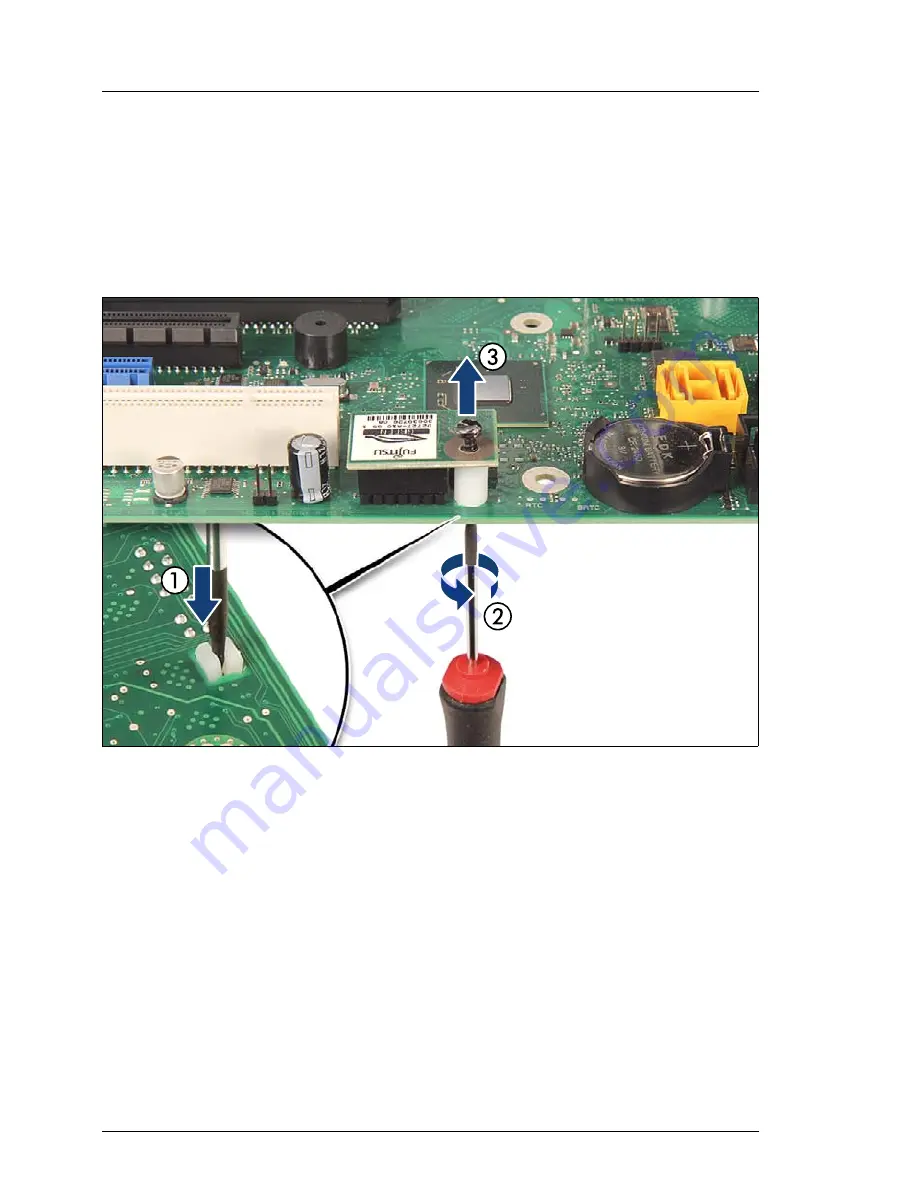
Figure 287: Removing the TPM screw
Ê
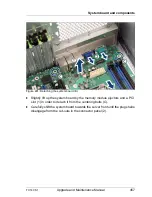
Locate the slotted lower end of the TPM screw (1).
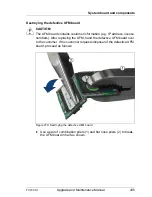
Ê
Carefully loosen the TPM screw using a thin slotted screw driver (e.g.
watchmaker's screw driver) or the dedicated TPM screw driver (Japanese
market) (2).
V
CAUTION!
Ensure to turn the screw
clockwise
in order to remove it!
Slowly and carefully increase the pressure on the screw until it begins
to turn. The effort when loosing the screw should be as low as
possible.
Otherwise the thin metal bar may break, rendering it impossible to
loosen the screw.
Summary of Contents for PRIMERGY TX140 S1
Page 6: ...Upgrade and Maintenance Manual TX140 S1 ...
Page 22: ...Upgrade and Maintenance Manual TX140 S1 Contents ...
Page 24: ...24 Upgrade and Maintenance Manual TX140 S1 ...
Page 40: ...40 Upgrade and Maintenance Manual TX140 S1 Before you start ...
Page 204: ...204 Upgrade and Maintenance Manual TX140 S1 Hard disk drives solid state drives ...
Page 292: ...292 Upgrade and Maintenance Manual TX140 S1 Expansion cards and backup units ...
Page 306: ...306 Upgrade and Maintenance Manual TX140 S1 Main memory ...
Page 370: ...370 Upgrade and Maintenance Manual TX140 S1 Accessible drives ...
Page 414: ...414 Upgrade and Maintenance Manual TX140 S1 Front panel and external connectors ...
Page 472: ...472 Upgrade and Maintenance Manual TX140 S1 System board and components ...
Page 568: ...568 Upgrade and Maintenance Manual TX140 S1 Cabling ...