TX140 S1
Upgrade and Maintenance Manual
241
Expansion cards and backup units
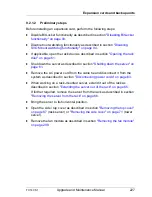
If the server has been completely removed from the rack for maintenance
purposes, reinstall and secure it in the rack as described in section
"Mounting the server in the rack" on page 87
.
Ê
Reconnect all external cables to the replaced expansion card.
Ê
Reconnect the AC power cord to the power supply unit and secure it with a
cable tie as described in section
"Connecting the server to the mains" on
page 90
.
Ê
If applicable, close the rack door as described in section
"Closing the rack
door" on page 92
.
Ê
Enable the PCI slot of the replaced expansion card as described in section
"Enabling replaced components in the system BIOS" on page 111
.
Ê
Inform the customer about changed WWN and MAC addresses. For further
information, refer to section
"Looking up changed MAC / WWN addresses"
on page 117
.
Ê
After replacing a network controller in a server running Linux OS, update its
MAC address in the related NIC definition file as described in section
"Updating the NIC configuration file in a Linux environment" on page 114
.
Ê
After installing or replacing a Modular RAID controller, update the firmware
as described in section
"Updating RAID controller firmware" on page 105
.
Ê
Enable boot watchdog functionality as described in section
"Enabling SVOM
boot watchdog functionality" on page 110
.
Ê
If BitLocker functionality is used and has been disabled before starting the
maintenance task, re-enable BitLocker as described in section
"Enabling
BitLocker functionality" on page 116
.
Ê
After replacing a network controller, reconfigure your network settings in the
operation system according to the original configuration of the replaced
controller (expansion card or onboard).
I
The following note are required for TX140 S1p (PYT14Pxxx for
Japanese market).
Configuration of network settings should be performed by the
customer.
For further information, please refer to section
"Note on network
settings recovery" on page 238
.
Ê
If applicable, restore LAN teaming configurations as described in section
"After replacing / upgrading LAN controllers" on page 120
.
Summary of Contents for PRIMERGY TX140 S1
Page 6: ...Upgrade and Maintenance Manual TX140 S1 ...
Page 22: ...Upgrade and Maintenance Manual TX140 S1 Contents ...
Page 24: ...24 Upgrade and Maintenance Manual TX140 S1 ...
Page 40: ...40 Upgrade and Maintenance Manual TX140 S1 Before you start ...
Page 204: ...204 Upgrade and Maintenance Manual TX140 S1 Hard disk drives solid state drives ...
Page 292: ...292 Upgrade and Maintenance Manual TX140 S1 Expansion cards and backup units ...
Page 306: ...306 Upgrade and Maintenance Manual TX140 S1 Main memory ...
Page 370: ...370 Upgrade and Maintenance Manual TX140 S1 Accessible drives ...
Page 414: ...414 Upgrade and Maintenance Manual TX140 S1 Front panel and external connectors ...
Page 472: ...472 Upgrade and Maintenance Manual TX140 S1 System board and components ...
Page 568: ...568 Upgrade and Maintenance Manual TX140 S1 Cabling ...

