When Connecting to a Network Which Requires a Certificate
About the procedure from unpackaging the scanner to turning the power on, refer to Getting Started.
1
Turn on the scanner.
For details, refer to
How to Turn the Power ON (page 56)
.
2
Install necessary software to the computer which is to be connected to the scanner.
For details about the software, refer to
.
Prepare the bundled Setup DVD-ROM.
HINT
When using PaperStream NX Manager, you do not need to install software from the bundled Setup DVD-
ROM. Install a necessary software by referring to the PaperStream NX Manager User's Guide.
a
If an old version of the software is installed, uninstall it first.
For details, refer to
Uninstalling the Software (page 316)
.
b
Insert the bundled Setup DVD-ROM into the DVD drive.
The [fi Series Setup] window appears.
c
Start the installation by following the instructions displayed in the screen.
It is recommended that you select [Installation (Recommended)].
d
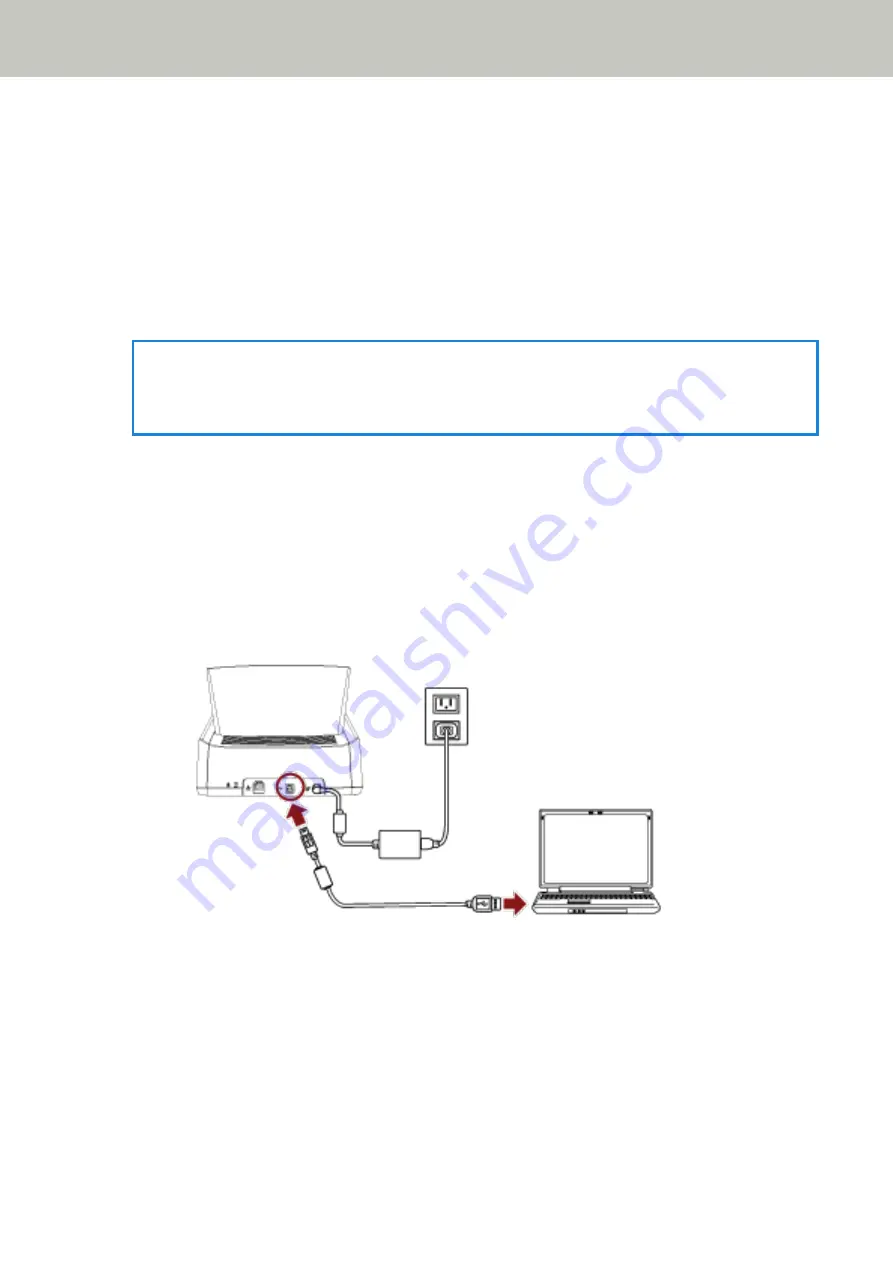
Connect the scanner to the computer by using the bundled USB cable.
e
Register a certificate with the scanner.
Use fi-7300NX Certificate Registration Tool to register a certificate with the scanner.
For details, refer to the fi-7300NX Certificate Registration Tool Help.
fi-7300NX Certificate Registration Tool can be started up in the following procedure:
●
Windows Server 2008 R2/Windows 7
Click [Start] menu → [All Programs] → [fi Series] → [fi-7300NX Certificate Registration Tool].
●
Windows Server 2012
Scanner Setup
42
Summary of Contents for fi-7300NX
Page 1: ...P3PC 6192 05ENZ2 FUJITSU Image Scanner fi 7300NX Operator s Guide ...
Page 44: ... Scanner Settings Network Scanner Setup 44 ...
Page 117: ... Documents on which the toner is not sufficiently fused Daily Care 117 ...
Page 257: ...The password is set Scanner Settings Software Operation Panel 257 ...
Page 260: ...The password is set Scanner Settings Software Operation Panel 260 ...
Page 314: ...Outer Dimensions The outer dimensions are as follows Unit mm in Appendix 314 ...


