264
Ot
her Co
nven
ient
Fu
nct
ions
c
Select the Schedule/Task to open
yc
• Holidays appear in red.
• National Holidays are based on "
国民の祝日に関する
法律及び老人福祉の一部を改正する法律
(
平成13年
法律第59号
) (law related to national holidays and
old-age persons' welfare law amended (Law No. 59,
2001))". Spring Equinox Day and Autumnal Equinox
Day are released in an official gazette on February 1
and may not be exact (as of November, 2006).
• The monthly view/weekly view does not have an icon
indicating whether there is a saved task.
• If you set "Auto Update" under "Time and Date" to
"ON (Time and time zone)", when the time is
updated, the set times for saved schedule events or
tasks are automatically adjusted.
• If Schedule events and tasks are set for the same
date, Schedule events (in ascending order of
starting time) then tasks (in ascending order of Shift
JIS of the entered name in the "Task") are
displayed.
Function Menu on Month View/Week View/
Day View/Detail Screen
a
Month View screen (P263)/Week View
screen (P263)/Day View screen (P263)/
Detail screen (P263)
yh
[Function]
y
Perform the following operations
Week View/Month View
Switch Calendar to Week/Month View.
Create New Event
Go to Step 3 (P261) of "Registering Schedule".
Create New Task
Go to Step 3 (P262) of "Registering Task".
Go to Today
Move the cursor to the current day. Or, open the screen of
the current day.
Edit
Modify the selected/displayed Schedule/Task. Go to Step 3
(P261) of "Registering Schedule"/Step 3 (P262) of
"Registering Task".
Delete
Delete the selected/displayed Schedule/Task.
yh
[Yes]
Copy
Copy the selected/displayed Schedule/Task.
yh
[Yes]
y
Use
s
to select the "Day", "Month", or
"Year" field
y
Use
j
/Dial Keys to enter the date
• Hereafter, go to Step 3 (P261) of "Registering Schedule"/
Step 3 (P262) of "Registering Task".
Print Schedule/Task with a printer compatible with
Bluetooth.
→
P275
Send
Store
Register Schedule/Task received via Bluetooth/Infrared to
Calendar.
Copy All Text
Copy all character information on detail screen.
Setup
Set details of Schedule.
→
P265
• For Schedule with repetition set, a screen for
selecting deletion type opens. Select "This Event
Only" to delete only a selected schedule. Select
"Repeating Event" to delete all repeating schedules
selected.
Day View screen
■
Notice
・
It is recommended that you take notes of the
contents stored in the Schedule/Task. If you
have a personal computer, you can save them
also to the personal computer by using the Data
Link Software and the FOMA USB Cable
(optional).
・
Note that a service counter such as DoCoMo
shop may not be able to copy data from your
existing FOMA handset to the new one,
depending on the specifications.
・
Be advised that DoCoMo is not responsible for
the loss of data stored in your FOMA handset
due to a malfunction, repair, or other
mishandling of the FOMA handset.
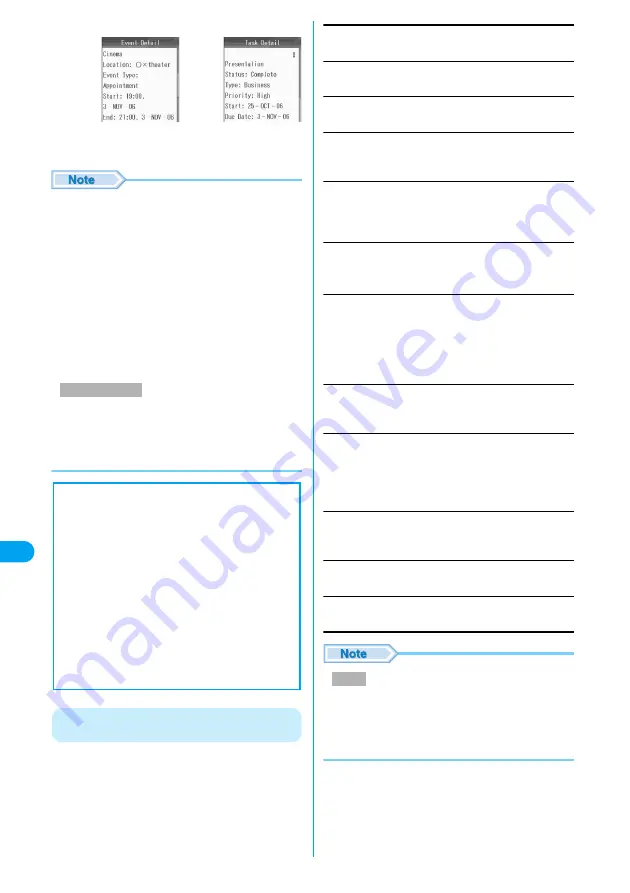
Schedule Detail
screen
Task Detail
screen
Infrared
Bluetooth
: Send the currently selected Datebook event/
task via infrared.
→
P254
: Send the currently selected Datebook event/
task via Bluetooth.
→
P273
Delete
D
a
te
bo
ok
Summary of Contents for M702iG
Page 147: ......
Page 161: ......
Page 185: ......
Page 227: ......
Page 285: ......
Page 301: ......
Page 311: ......
Page 376: ...369 MEMO ...
Page 377: ...370 MEMO ...
Page 384: ......


