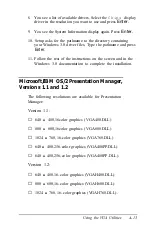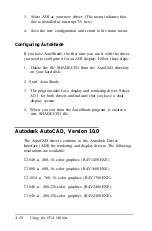
Installing the Drivers
Use the instructions in your AutoCAD documentation to install
the program on your hard disk. To install the drivers, follow the
steps below:
1.
Run the VGA Driver Setup program on your Utility 1
diskette to copy the AutoCAD 10.0 drivers to your hard
disk. See “Using the VGA Driver Setup Program” on page
A-4 for instructions.
When Setup asks for the name of the drive and directory to
contain the driver files, erase the default name and enter the
directory containing your AutoCAD 10.0 program files.
2.
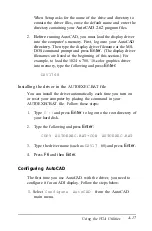
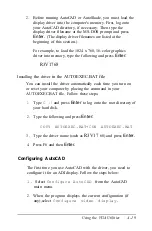
Prior to starting an AutoCAD or AutoShade session, you
must load the display driver into the computer’s memory.
First, log onto your AutoCAD directory, if necessary. Then
type the display driver filename at the MS-DOS prompt and
press
Enter.
(The display driver filenames are listed at the
beginning of this section.)
For example, to load the 1024 x 768, 16-color graphics
driver, type the following and press
Enter:
R4V1768
Note
If
you are using two monitors with your system, include
the
-D
option on the command line. For example, to load
the 1024 x 768 driver in a dual-monitor configuration,
type the
following
and press
Enter:
R4V1768 -D
Using the VGA Utilities
A-21
Summary of Contents for Equity 386/25
Page 1: ......
Page 3: ......
Page 14: ...xii ...
Page 20: ...6 lntroduction ...
Page 63: ...Hard disk drive types continued Running the Setup Program 2 25 ...
Page 142: ...5 34 lnstalling and Removing Options ...
Page 248: ...C 14 Physically Formatting a Hard Disk ...
Page 298: ...F 6 Specifications ...
Page 326: ......


