How To
71
Network Guide
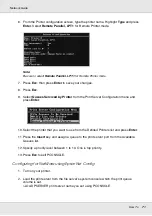
6. From the Printer configuration screen, type the printer name. Highlight
Type
and press
Enter
. Select
Remote Parallel, LPT1
for Remote Printer mode.
Note:
Be sure to select
Remote Parallel, LPT1
for Remote Printer mode.
7. Press
Esc
; then press
Enter
to save your changes.
8. Press
Esc
.
9. Select
Queues Serviced by Printer
from the Print Server Configuration menu and
press
Enter
.
10. Select the printer that you want to use from the Defined Printers list and press
Enter
.
11. Press the
Insert
key and assign a queue to the print server port from the Available
Queues list.
12. Specify a priority level between 1 to 10. One is top priority.
13. Press
Esc
to exit PCONSOLE.
Configuring for NetWare using EpsonNet Config
1. Turn on your printer.
2. Load the print server from the file server’s system console which the print queue
volume is set.
>LOAD PSERVER print server name you set using PCONSOLE

