Tips for Administrator
171
Network Guide
Note:
❏
To activate Buffer Size settings, you must turn off the printer for more than five seconds then
turn it back on. Or, you can perform a Reset All operation, as explained in “Reset Menu” in the
User’s Guide.
❏
Resetting the printer erases all print jobs. Make sure the Ready light is not flashing when you
reset the printer.
Setting an IP Address on the Printer’s Control Panel (Large
Format Inkjet Printers)
After connecting the printer to the network, you need to set the IP address for the network
interface.
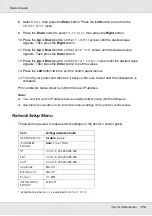
To set the IP address, subnet mask, and default gateway from the control panel, follow the
steps below.
1. Turn on your printer.
2. Press the
Right
button on the printer’s control panel once to display
MENU
.
3. Press the
Down
button until
NETWORK SETUP
appears. Then press the
Right
button.
4. Select
NETWORK SETUP
, then press the
Right
button.
5. Select
ENABLE
, then press the
Enter
button to enable the network settings menu.
6. Press the
Left
button to display the
NETWORK SETUP
menu.
7. Press the
Down
button to select
IP ADDRESS SETTING
, then press the
Right
button.
You can use the following methods to get an IP address.
❏
Choose
Auto
when getting the IP address from a DHCP server. The IP address is
automatically obtained from the DHCP server whenever the printer is reset or turned
on.
❏
Choose
Panel
when setting the IP address, subnet mask, and default gateway
using the printer’s control panel.
❏
Choose
PING
when setting the IP address using the arp/ping command. The
network interface uses the IP address set by the arp/ping command. The settings
become available when the printer is reset or turned off and then back on.
Note:
❏
To use
Auto
, a DHCP server must be correctly configured on the network. See the online
help of your operating system for detailed instructions.
❏
Choose
PING
only when setting the IP address using the arp/ping command.


