EPSON Stylus COLOR 900/900N
Chapter 6 Maintenance
165
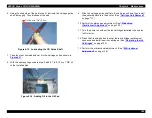
6. Using the oiled side of the pad (step 5), lubricate the carriage guide
shaft thoroughly. Then dispose of the pad.
Figure 6-13. Lubricating the CR Guide Shaft
7. Take the other new pad and set it in the carriage unit as shown in
8. With the same syringe used in step 5, add 0.7 to 0.75 cc of “O8” oil
to the installed pad.
Figure 6-14. Adding Oil to the Oil Pad
9. Slide the carriage guide shaft into the carriage unit, and then install
the assembly back into the printer. (See
on page 111.)
10. Perform the platen gap adjustment. (See
on page 150.)
11. Turn the printer on without the ink cartridges installed to cause the
Ink Out error.
12. Press the Cleaning button to enter the ink cartridge replacement
sequence and install new ink cartridges. (See
on page 154.)
13. Perform the bi-directional adjustment. (See
on page 138.)
O i l P a d w i t h " O 8 " ( 0 . 5 c c )
0 . 7 - 0 . 7 5 c c
Summary of Contents for 900N
Page 1: ...EPSONStylusCOLOR900 900N Color ink jet printer TM SC900 N 6 59 0 18 ...
Page 8: ... 37 5 PRODUCTDESCRIPTION ...
Page 37: ... 37 5 OPERATINGPRINCIPLES ...
Page 67: ... 37 5 TROUBLESHOOTING ...
Page 89: ... 37 5 DISASSEMBLYANDASSEMBLY ...
Page 121: ... 37 5 ADJUSTMENTS ...
Page 156: ... 37 5 MAINTENANCE ...
Page 169: ... 37 5 APPENDIX ...
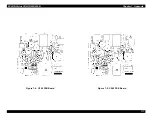
Page 179: ...EPSON Stylus COLOR 900 900N Chapter 7 Appendix 176 Figure 7 3 C265 Main Board Soldering side ...
Page 181: ...EPSON Stylus COLOR 900 900N Chapter 7 Appendix 178 Figure 7 6 C265 PNL Board ...
Page 195: ...06 03 01 02 for S E ASIA 03 03 05 03 04 EPSON STYLUS COLOR 900 No 7 10056 Rev 01 ...
Page 197: ......
Page 198: ......
Page 199: ......
Page 200: ......
Page 201: ......

