EPSON Stylus COLOR 900/900N
Chapter 6 Maintenance
164
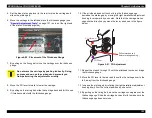
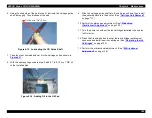
2. Clean the carriage guide shaft by wiping the shaft’s surface with a
dry cloth.
Figure 6-10. Cleaning the Carriage Guide Shaft
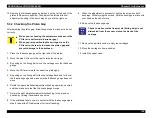
3. Remove the felt oil pad from the back of the carriage unit.
NOTE: The oil pad may have already fallen out when you removed
the carriage unit.
4. Using the dry cloth, clean the inside surfaces of the two metal
bushings in the carriage unit through which the carriage guide shaft
passes. If you see any black stains, wipe them off completely. Also,
clean the area where the oil pad is seated.
Figure 6-11. Cleaning Under the Carriage
5. Add 0.5 cc of “O8” oil to one of the new oil pads, using the small
syringe.
Figure 6-12. Adding Oil to the Oil Pad
C a r r i a g e G u i d e S h a f t
D r y c l o t h
O i l P a d
M e t a l l i c b u s h i n g s
W i p e o f f b l a c k
s t a i n s c o m p l e t e l y .
Metal bushings
A d d
" O 8 " ( 0 . 5 c c )
Summary of Contents for 900N
Page 1: ...EPSONStylusCOLOR900 900N Color ink jet printer TM SC900 N 6 59 0 18 ...
Page 8: ... 37 5 PRODUCTDESCRIPTION ...
Page 37: ... 37 5 OPERATINGPRINCIPLES ...
Page 67: ... 37 5 TROUBLESHOOTING ...
Page 89: ... 37 5 DISASSEMBLYANDASSEMBLY ...
Page 121: ... 37 5 ADJUSTMENTS ...
Page 156: ... 37 5 MAINTENANCE ...
Page 169: ... 37 5 APPENDIX ...
Page 179: ...EPSON Stylus COLOR 900 900N Chapter 7 Appendix 176 Figure 7 3 C265 Main Board Soldering side ...
Page 181: ...EPSON Stylus COLOR 900 900N Chapter 7 Appendix 178 Figure 7 6 C265 PNL Board ...
Page 195: ...06 03 01 02 for S E ASIA 03 03 05 03 04 EPSON STYLUS COLOR 900 No 7 10056 Rev 01 ...
Page 197: ......
Page 198: ......
Page 199: ......
Page 200: ......
Page 201: ......


