EPSON Stylus COLOR 900/900N
Chapter 6 Maintenance
156
6.3 Cleaning the Printhead
If your printouts have problems like white banding, color banding, or
missing dots, the printhead may need to be cleaned. You can clean the
printhead either by using the adjustment program or the printer’s control
panel. To clean using the adjustment program, see
on page 143. Otherwise, follow these steps:
1. Make sure the printer is turned on and not printing.
2. Press the Cleaning button and hold it down for three seconds. The
power light flashes and the printer begins cleaning the printhead.
This takes about two minutes.
You can repeat these steps as many times as necessary. (The
Stylus COLOR 900/900N is not equipped with the CL3 or so-called
“dummy cleaning” sequence, so you don’t have to print a test page
between each cleaning cycle.) When you’re done and the power light
stops flashing, print a test page to inspect image quality:
1. Turn the printer off.
2. Hold down the Load/Eject button and then press the power button.
Continue holding down the Load/Eject button for about three
seconds. The test page begins to print.
After the test page prints, inspect the nozzle check pattern for missing
dots or lines. If you see any gaps in the pattern, clean the printhead
again as described above. Note that it may take as many as seven or
eight cleaning cycles to clean the printhead fully.
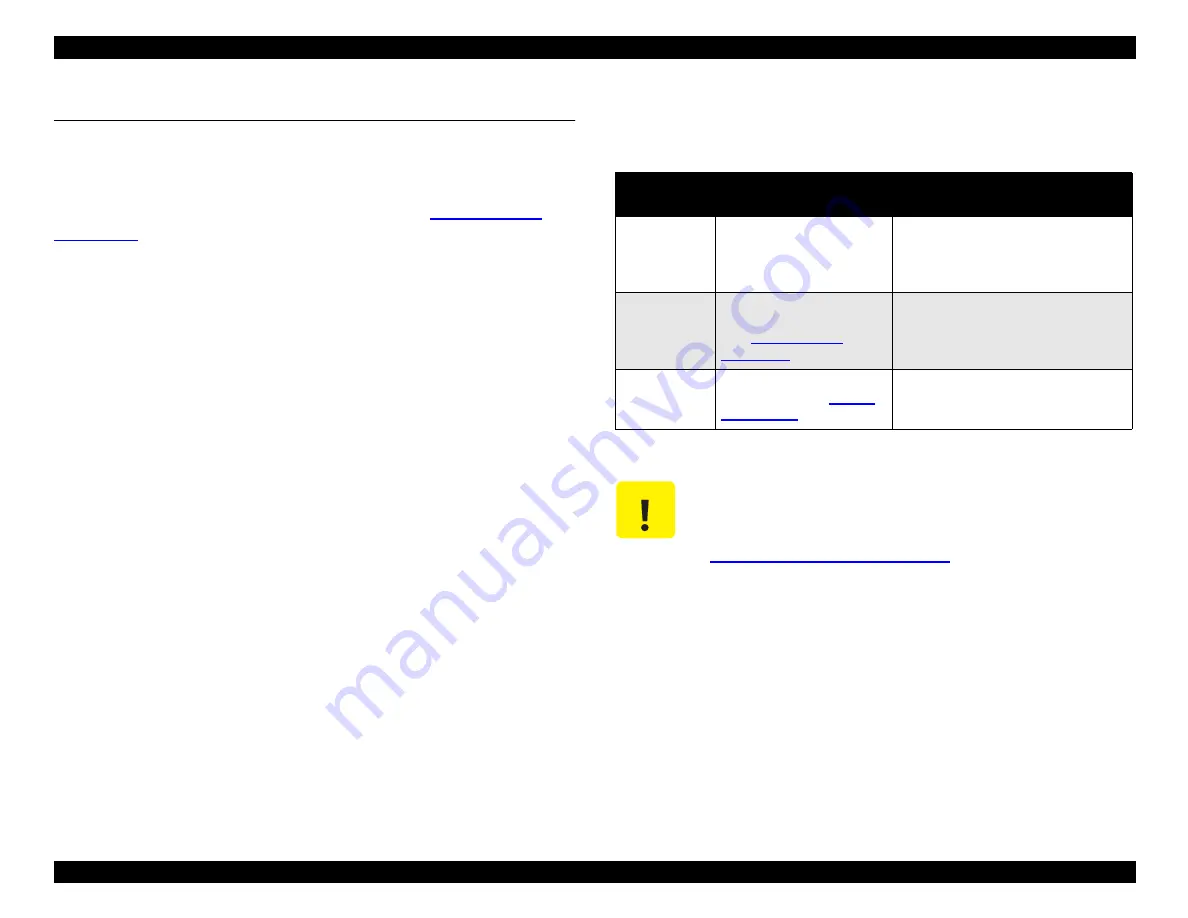
The methods of cleaning the printhead are ranked below by their level
of effectiveness:
Table 6-1. Methods of Cleaning the Printhead
Level of
Effectiveness
Cleaning Method
Notes
1
Printhead cleaning using
the control panel
Sometimes performs CL2, but not
always. Depends on current value of
CL timer and number of pages printed
since last cleaning.
2
Printhead cleaning using
the adjustment program
(see
Always performs CL2, the strongest
cleaning cycle.
3
Resetting the Initial Ink
Charge Flag (see
The most powerful way of cleaning
the printhead.
C A U T I O N
If your printing results get worse each time you clean,
the ink cartridges may have run out of ink. In this case,
replace the ink cartridges with new ones as described
in
Summary of Contents for 900N
Page 1: ...EPSONStylusCOLOR900 900N Color ink jet printer TM SC900 N 6 59 0 18 ...
Page 8: ... 37 5 PRODUCTDESCRIPTION ...
Page 37: ... 37 5 OPERATINGPRINCIPLES ...
Page 67: ... 37 5 TROUBLESHOOTING ...
Page 89: ... 37 5 DISASSEMBLYANDASSEMBLY ...
Page 121: ... 37 5 ADJUSTMENTS ...
Page 156: ... 37 5 MAINTENANCE ...
Page 169: ... 37 5 APPENDIX ...
Page 179: ...EPSON Stylus COLOR 900 900N Chapter 7 Appendix 176 Figure 7 3 C265 Main Board Soldering side ...
Page 181: ...EPSON Stylus COLOR 900 900N Chapter 7 Appendix 178 Figure 7 6 C265 PNL Board ...
Page 195: ...06 03 01 02 for S E ASIA 03 03 05 03 04 EPSON STYLUS COLOR 900 No 7 10056 Rev 01 ...
Page 197: ......
Page 198: ......
Page 199: ......
Page 200: ......
Page 201: ......

