EPSON Stylus COLOR 900/900N
Chapter 4 Disassembly and Assembly
92
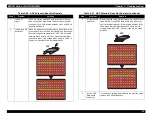
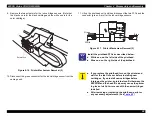
Figure 4-3. Control Panel Removal
4.2.2 Disconnecting the Main Wiring Harnesses
1. Remove the upper case. (See
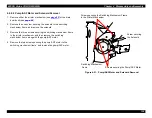
2. Remove the three screws securing the shield plate bracket to the
right side of the printer, and then remove the bracket.
3. Unlock the cable clips securing the two printhead control FFCs, and
then disconnect the FFCs from the C265 main board.
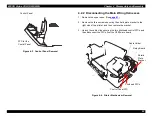
Figure 4-4. Printer Mechanism Removal
FFC for the
Control Panel
Control Panel
Cable Holder
Relay Board
Shield
Plate
Bracket
Printhead FFCs
Control Panel FFC
Summary of Contents for 900N
Page 1: ...EPSONStylusCOLOR900 900N Color ink jet printer TM SC900 N 6 59 0 18 ...
Page 8: ... 37 5 PRODUCTDESCRIPTION ...
Page 37: ... 37 5 OPERATINGPRINCIPLES ...
Page 67: ... 37 5 TROUBLESHOOTING ...
Page 89: ... 37 5 DISASSEMBLYANDASSEMBLY ...
Page 121: ... 37 5 ADJUSTMENTS ...
Page 156: ... 37 5 MAINTENANCE ...
Page 169: ... 37 5 APPENDIX ...
Page 179: ...EPSON Stylus COLOR 900 900N Chapter 7 Appendix 176 Figure 7 3 C265 Main Board Soldering side ...
Page 181: ...EPSON Stylus COLOR 900 900N Chapter 7 Appendix 178 Figure 7 6 C265 PNL Board ...
Page 195: ...06 03 01 02 for S E ASIA 03 03 05 03 04 EPSON STYLUS COLOR 900 No 7 10056 Rev 01 ...
Page 197: ......
Page 198: ......
Page 199: ......
Page 200: ......
Page 201: ......


