EPSON Stylus COLOR 900/900N
Chapter 4 Disassembly and Assembly
106
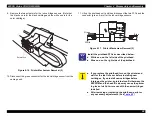
4. Release the four hooks securing the roller to the frame, and then
remove the roller.
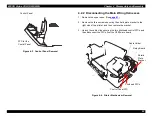
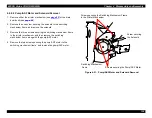
Figure 4-29. Feed Roller Removal
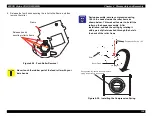
Figure 4-30. Installing the Compression Spring
C A U T I O N
Never touch the rubber part of the feed roller with your
bare hands.
P a p e r L o a d i n g A s s e m b l y
H o o k s F i x i n g t h e
L D R o l l e r A s s e m b l y
Frame
Release hooks
securing roller to frame
C H E C K
P O I N T
r
During assembly, secure compression spring
1.66 to the hooks inside the roller frame as
shown below. This makes it easier to install the
roller on the hopper assembly. After
installation, unhook the spring by rotating it
with a pair of pliers inserted through the hole in
the back of the roller frame.
C o m p r e s s i o n S p r i n g 1 . 6 6
R o l l e r
R o l l e r F r a m e
D u r i n g a s s e m b l y , s e c u r e t h e c o m p r e s s i o n
s p r i n g t e m p o r a r i l y t o t h e s e h o o k s .
Summary of Contents for 900N
Page 1: ...EPSONStylusCOLOR900 900N Color ink jet printer TM SC900 N 6 59 0 18 ...
Page 8: ... 37 5 PRODUCTDESCRIPTION ...
Page 37: ... 37 5 OPERATINGPRINCIPLES ...
Page 67: ... 37 5 TROUBLESHOOTING ...
Page 89: ... 37 5 DISASSEMBLYANDASSEMBLY ...
Page 121: ... 37 5 ADJUSTMENTS ...
Page 156: ... 37 5 MAINTENANCE ...
Page 169: ... 37 5 APPENDIX ...
Page 179: ...EPSON Stylus COLOR 900 900N Chapter 7 Appendix 176 Figure 7 3 C265 Main Board Soldering side ...
Page 181: ...EPSON Stylus COLOR 900 900N Chapter 7 Appendix 178 Figure 7 6 C265 PNL Board ...
Page 195: ...06 03 01 02 for S E ASIA 03 03 05 03 04 EPSON STYLUS COLOR 900 No 7 10056 Rev 01 ...
Page 197: ......
Page 198: ......
Page 199: ......
Page 200: ......
Page 201: ......

