EPSON Stylus COLOR 900/900N
Chapter 5 Adjustments
134
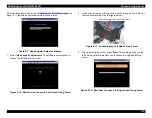
4. Loosen the screw by turning it one-quarter to one-half turn. Do not
remove it completely. See the figure below.
Figure 5-19. Loosening the Right Head Fixing Screw
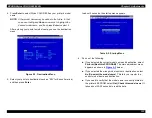
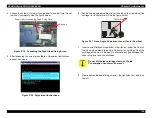
5. After loosening the screw, press Enter. Adjustment instructions
appear on screen.
Figure 5-20. Adjustment Instructions
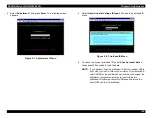
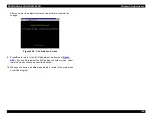
6. Set the head angle adjustment lever (located on the right side of the
carriage) to its center mark. See the figure below:
Figure 5-21. Head Angle Adjustment Lever (Center Position)
7. Insert a small flathead screwdriver or similar tool under the front of
the ink cartridge clamp (blue lid) of the color ink cartridge. Push the
cartridge all the way to the back to eliminate any gap between the
head fixing lever and the printhead.
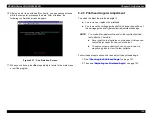
8. Gently tighten the head fixing screws—the right side first, and then
the left.
C a p u n i t
S c r e w ( r i g h t ) s e c u r i n g t h e H e a d F i x i n g P l a t e
C A U T I O N
Do not lift the ink cartridge clamp, or the Ink
Consumption Counter will be reset.
C e n t e r M a r k
Summary of Contents for 900N
Page 1: ...EPSONStylusCOLOR900 900N Color ink jet printer TM SC900 N 6 59 0 18 ...
Page 8: ... 37 5 PRODUCTDESCRIPTION ...
Page 37: ... 37 5 OPERATINGPRINCIPLES ...
Page 67: ... 37 5 TROUBLESHOOTING ...
Page 89: ... 37 5 DISASSEMBLYANDASSEMBLY ...
Page 121: ... 37 5 ADJUSTMENTS ...
Page 156: ... 37 5 MAINTENANCE ...
Page 169: ... 37 5 APPENDIX ...
Page 179: ...EPSON Stylus COLOR 900 900N Chapter 7 Appendix 176 Figure 7 3 C265 Main Board Soldering side ...
Page 181: ...EPSON Stylus COLOR 900 900N Chapter 7 Appendix 178 Figure 7 6 C265 PNL Board ...
Page 195: ...06 03 01 02 for S E ASIA 03 03 05 03 04 EPSON STYLUS COLOR 900 No 7 10056 Rev 01 ...
Page 197: ......
Page 198: ......
Page 199: ......
Page 200: ......
Page 201: ......


