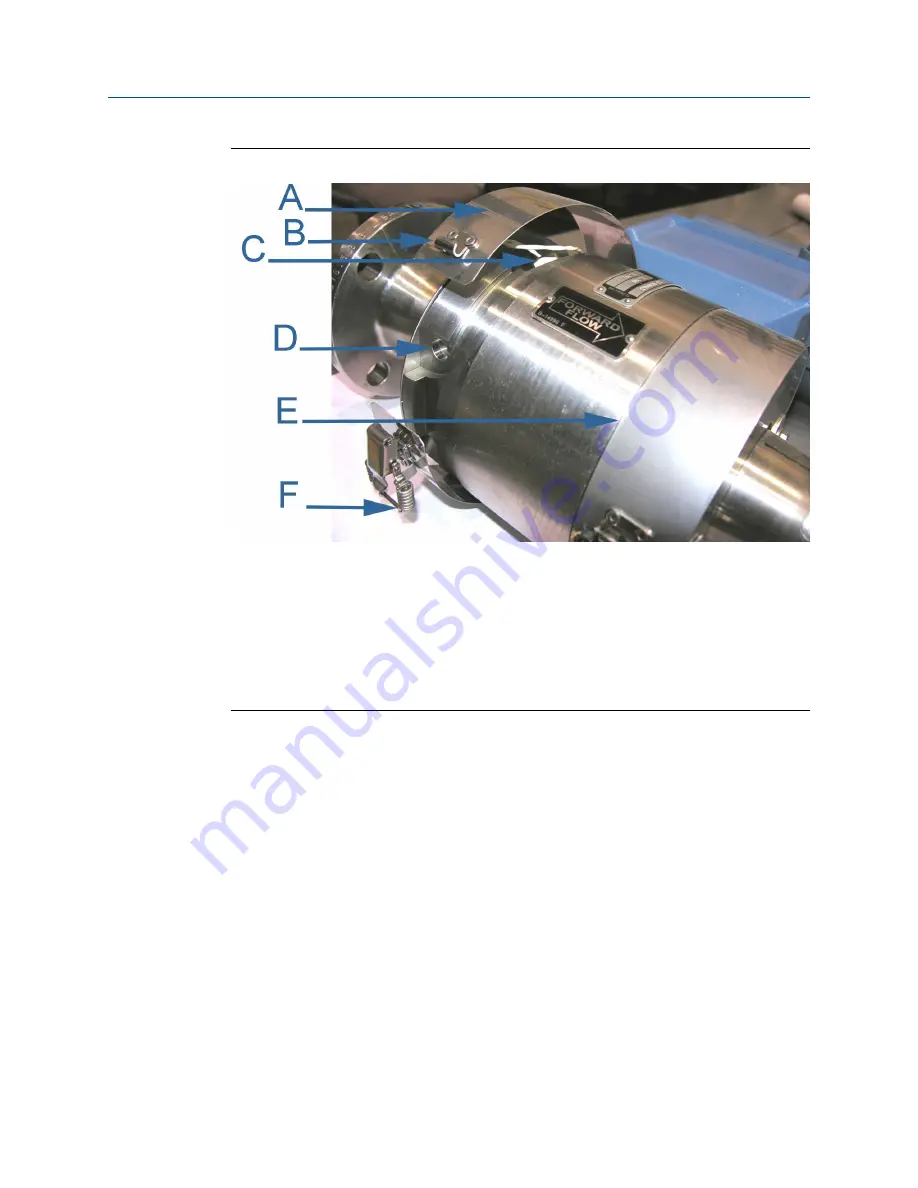
Figure 3-75: Latched band shroud assembly
A. Band shroud
B. Stainless steel strike
C. Transducer cable
D. Meter body recess for pop rivet allowance
E. Meter body shoulder
F. Shroud latch
Procedure
1. Grasp the band shroud assembly by opposing edges and spread apart.
2. Place over the body outside diameter.
3. Align the shroud’s inside edges so they are flush against the meter body shoulder
).
4. Hold the shroud snugly against the meter body and position the latch and strike so
they are centered on the bottom of the meter body.
5. Lift the latch and over the strike and press down firmly.
6. Repeat
7. Visually inspect the shrouds covering for proper fit on the meter body. Ensure the
bands are flush against the body shoulders and the latches are evenly aligned.
Maintenance and Troubleshooting Manual
Meter maintenance
00809-0100-3812
April 2022
Rosemount 3812 Liquid Ultrasonic Flow Meter
115


