


12
www.digiop.com
SECTION 2: INSTALLATION
NOTE
Only the last octet of the laptop IP address should be different from that of the camera (e.g. camera = 192.168.1.7,
PC = 192.168.1.10).
10. Enter
255.255.255.0
in the Subnet Mask field.
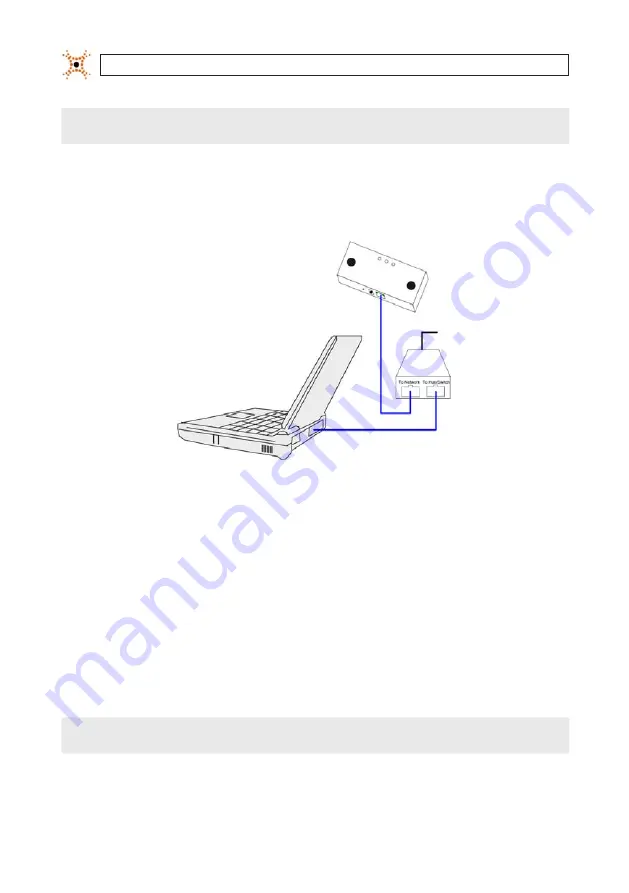
2.1.2 Connect the DIGIOP® 3D camera to your PC
To Power
Source
Typical Configuration for Initial IP address re-configuration
1.
Plug the Power-over-Ethernet (PoE) injector or PoE switch to a power outlet.
2.
Plug an Ethernet (CAT5e) cable from the “In” port (outside port) of the DIGIOP® 3D camera to the “Network” port of the PoE
injector or switch.
3.
Plug an Ethernet drop cable from the
Switch
port of the PoE injector into the Ethernet port in your computer.
2.1.3 Set the IP Address of the DIGIOP® 3D camera
After setting the IP address on your PC and connected it to the DIGIOP® 3D camera and PoE injector, setup the IP address of the
camera as follows:
NOTE
Before you can use the DIGIOP® 3D camera web pages, you must install Java Runtime Environment (JRE 1.5.0_04 or higher)
on your PC.


