


99
DIGIOP® 3D Camera User Manual
SECTION 10: USING THE MANUAL RESET BUTTON
SECTION 10
Using the Manual Reset Button
The DIGIOP® 3D camera has a reset button located to the left of the external power port. This button enables you to do the
following:
•
Reset the DIGIOP® 3D camera network configuration. This option resets the IP address of the DIGIOP® 3D camera to 192.168.1.7.
•
Reset all DIGIOP® 3D camera parameters and the network configuration to factory defaults. This option resets the camera
configuration settings, deletes all zones, and resets the license code.
•
Disable booting of the current application. This option prevents the camera from booting up the currently installed firmware
and forces the camera to boot up with the software upgrade application installed from the factory. Once the camera reboots, it
will attempt to automatically retrieve a software update from upgrade.DIGIOP.local and 192.168.1.18 via TFTP.
•
Reset Privacy Options.
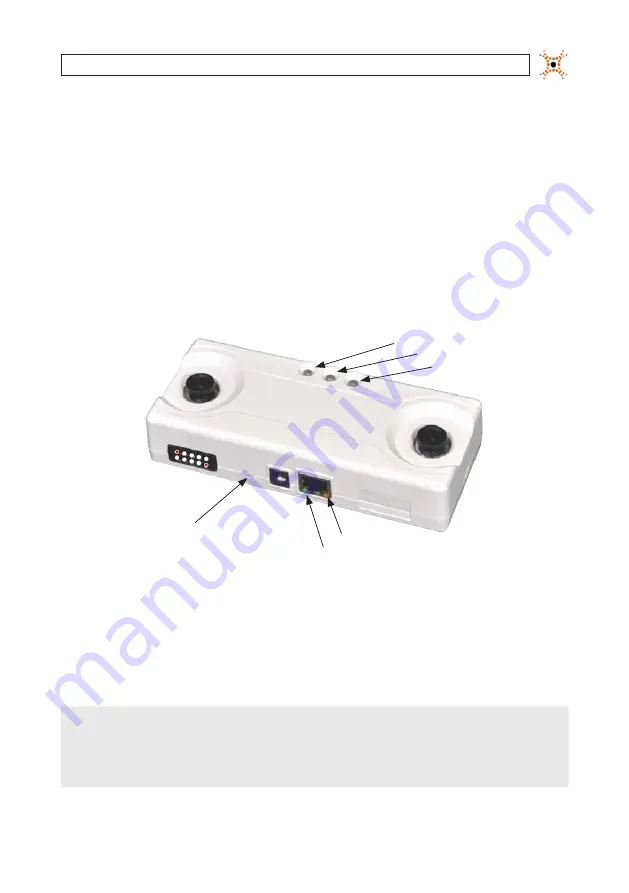
Status LED 1
Status LED 2
Status LED 3
Reset button
Ethernet Activity LED
Ethernet Link LED
Complete the following steps to perform a reset:
1.
Insert a paper clip into the reset button hole on the DIGIOP® 3D camera and press the button until the desired color
illuminates on LED 3, then release the button. Use the chart below to determine how long to press the reset button:
2.
When the desired LED color illuminates, it stays lit for 10 seconds. During that time, you must press and release the button a
second time to confirm the action. The camera will then executes the action and reboot.
NOTE
If the firmware is corrupted and your camera constantly reboots, unplug the camera, hold in the reset button, plug in the
camera, then complete the reset steps.
LED 3 changes to different colors depending on how long you hold the button down. For example if you want to disable
booting of the current application, you will hold the button down for 8 seconds. During this time you will observe LED 3
turning green, then amber, and finally red.


