COMPASS
for molbox™ User’s Manual
Page 171
© 1998-2003
DH Instruments, Inc
.
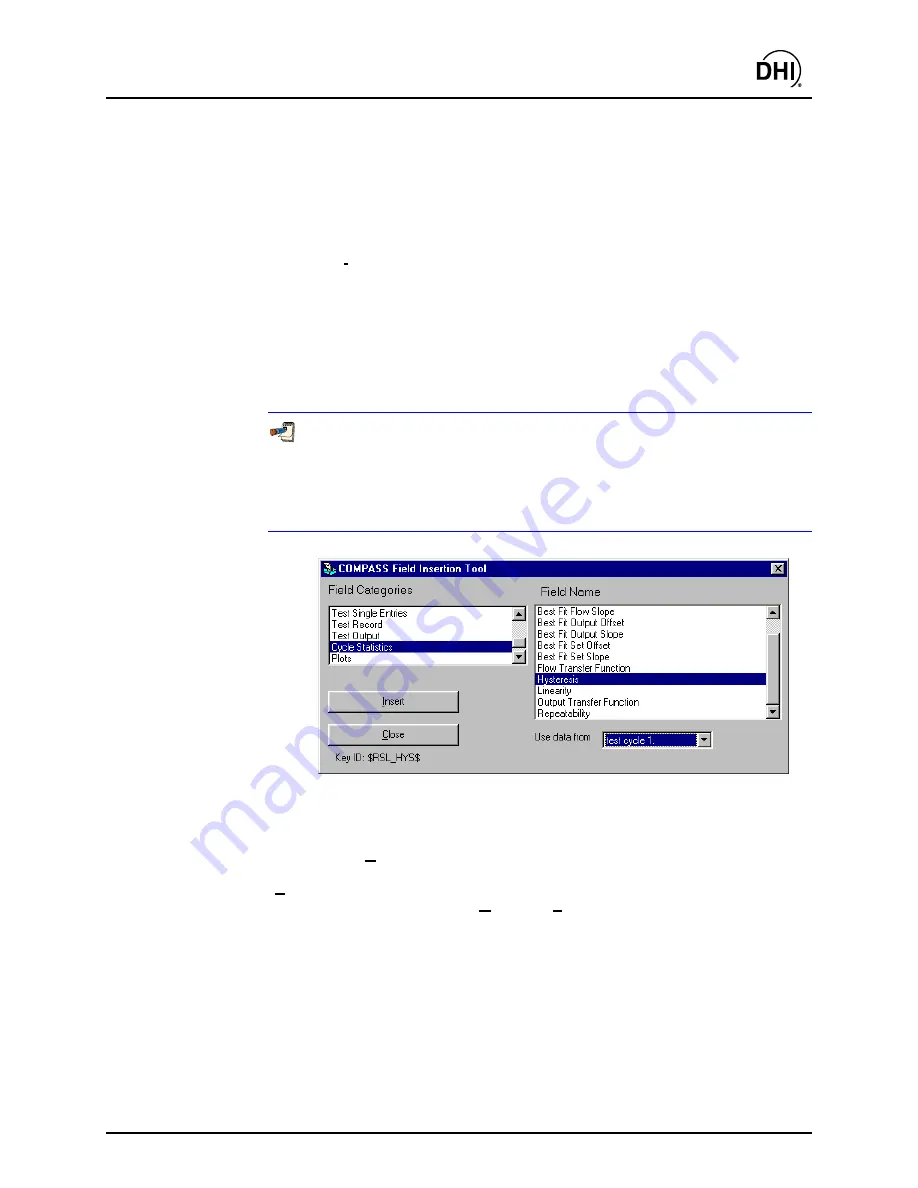
To embed a link using the field insertion tool, place the cursor in the report
template at the desired location of the link. Press
[CTRL] + T
to invoke the Data
Field Insertion Tool. The tool appears over the top of the open report template.
The Data File fields available are sorted into “field categories”. Select a
<Field
Category>
by clicking on the desired category. Then select a
<Field Name>
by
clicking on the desired field name. The scroll bars may be used to move up and
down in the category and name lists. Once the field name has been selected,
click the
<Insert>
button to embed the link into the document at the current
cursor location and close the Data Field Insertion Tool. The embedded link
appears as a character string (e.g., $DUT_MNF$). The character strings have
consistent and intuitive structure to help identify them in use ($category_field
name$, except data in columns such as output data has two $$). Do not edit the
link character strings or they will no longer operate. They can be cut and pasted
to new locations so long as care is taken not to alter them. The formatting
present in the document at the current insertion point is applied to the field link
and to the data imported from the test Data File when the template is merged.
It is a good idea to use tabs to fix field key locations when column alignment
is desired in a report. Using spaces does not always give the desired results.
Text can vary in size based on the selected font. This moves the relative
location of an inserted field preventing the desired column alignment. Click the
<Ruler> to create a tab or adjust an existing tab to get the desired effect.
Figure 95.
<Field Insertion Tool>
Panel
16.3.3.3 [FORMAT], [SELECT TEMPLATE]
[Select Template]
displays a standard Windows file selection tool set to the
template directory specified by
[Options]
,
[Path]
,
<Templates Path>
(see Section
16.3.4.4). The selected template name appears on the bottom status bar as the
<Current Template>
.
All reports generated will use this file as the report
template until the selection changes. The most recent
<Current Template>
is
saved by the
COMPASS Report Editor
. So, this field does not require regular
updating unless the template to use changes.
Summary of Contents for COMPASS FOR MOLBOX
Page 1: ...1998 2003 DH Instruments Inc COMPASS for molbox Flow Calibration Software User s Manual...
Page 16: ...COMPASS for molbox User s Manual 1998 2003 DH Instruments Inc Page 2 N NO OT TE ES S...
Page 20: ...COMPASS for molbox User s Manual 1998 2003 DH Instruments Inc Page 6 N NO OT TE ES S...
Page 64: ...COMPASS for molbox User s Manual 1998 2003 DH Instruments Inc Page 50 N NO OT TE ES S...
Page 94: ...COMPASS for molbox User s Manual 1998 2003 DH Instruments Inc Page 80 N NO OT TE ES S...
Page 112: ...COMPASS for molbox User s Manual 1998 2003 DH Instruments Inc Page 98 N NO OT TE ES S...
Page 150: ...COMPASS for molbox User s Manual 1998 2003 DH Instruments Inc Page 136 N NO OT TE ES S...
Page 166: ...COMPASS for molbox User s Manual 1998 2003 DH Instruments Inc Page 152 N NO OT TE ES S...
Page 172: ...COMPASS for molbox User s Manual 1998 2003 DH Instruments Inc Page 158 N NO OT TE ES S...
Page 192: ...COMPASS for molbox User s Manual 1998 2003 DH Instruments Inc Page 178 N NO OT TE ES S...
Page 194: ...COMPASS for molbox User s Manual 1998 2003 DH Instruments Inc Page 180 N NO OT TE ES S...
Page 200: ...COMPASS for molbox User s Manual 1998 2003 DH Instruments Inc Page 186 N NO OT TE ES S...
Page 216: ...COMPASS for molbox User s Manual 1998 2003 DH Instruments Inc Page 202 N NO OT TE ES S...
Page 220: ...COMPASS for molbox User s Manual 1998 2003 DH Instruments Inc Page 206 N NO OT TE ES S...
Page 224: ...COMPASS for molbox User s Manual 1998 2003 DH Instruments Inc Page 210 N NO OT TE ES S...
Page 226: ...COMPASS for molbox User s Manual 1998 2003 DH Instruments Inc Page 212 N NO OT TE ES S...


