Installing Upgrades
83
Leave the release lever extended so that the socket is ready for the new
microprocessor.
M i c r o p r o c e s s o r R e m o v a l
NOTICE:
Ground yourself by touching an unpainted metal surface on the
back of the computer.
NOTICE:
Be careful not to bend any of the pins when you unpack the
microprocessor. Bending the pins can permanently damage the microprocessor.
6
Unpack the new microprocessor.
If any of the pins on the chip appear to be bent, see "
Getting Help
" for
instructions on obtaining technical assistance.
7
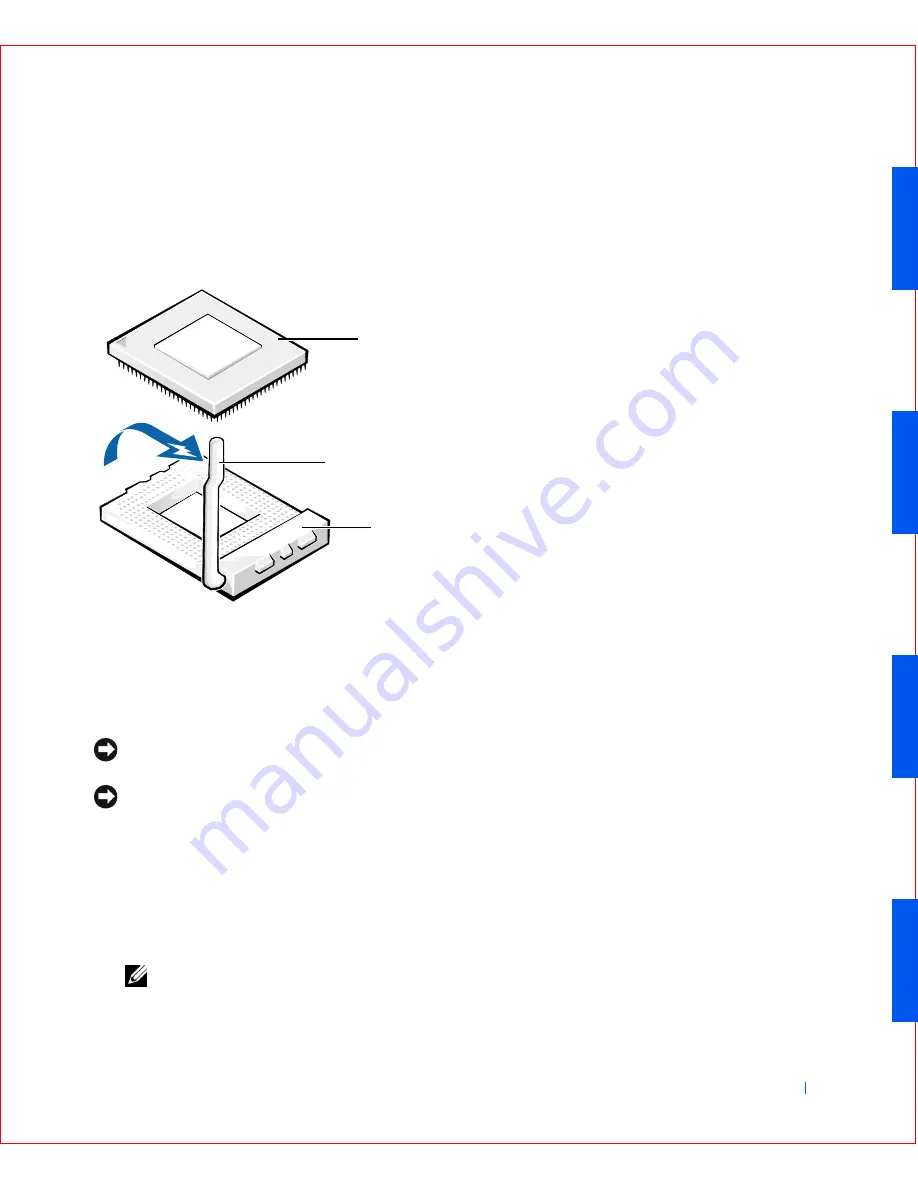
Align the pin-1 corner of the microprocessor chip with the pin-1 corner
of the microprocessor socket.
NOTE:
You must identify the pin-1 corner to correctly position the chip.
1
Microprocessor chip
2
Release lever
3
Microprocessor socket
1
2
3
Summary of Contents for OptiPlex GX50
Page 1: ...w w w d e l l c o m s u p p o r t d e l l c o m Dell OptiPlex GX50 Systems User s Guide ...
Page 10: ...x Contents ...
Page 40: ...38 Abo u t You r C o mp u t er w w w d e l l c o m s u p p o r t d e l l c o m ...
Page 113: ...Installing Upgrades 111 1 Floppy drive cable 2 Lever 1 2 ...
Page 117: ...Installing Upgrades 115 S ma l l D es k t op C om p u te r Small Mini Tow er Comput er ...
Page 136: ...134 Ins ta l l i n g Up g r a d es w w w d e l l c o m s u p p o r t d e l l c o m ...
Page 154: ...152 Microsoft Windows XP Features w w w d e l l c o m s u p p o r t d e l l c o m ...
Page 162: ...160 Te c h n ic a l Sp e c if ic a tio n s w w w d e l l c o m s u p p o r t d e l l c o m ...
Page 210: ...208 So lv ing Pr o ble m s w w w d e l l c o m s u p p o r t d e l l c o m ...
Page 232: ...230 Ge tt ing Help w w w d e l l c o m s u p p o r t d e l l c o m ...


