106
Installing Upgrades
w
w
w
.d
e
ll
.co
m
|
s
u
p
p
o
rt
.d
e
ll.c
o
m
S m a l l M i n i -To w e r C o m p u t e r
2
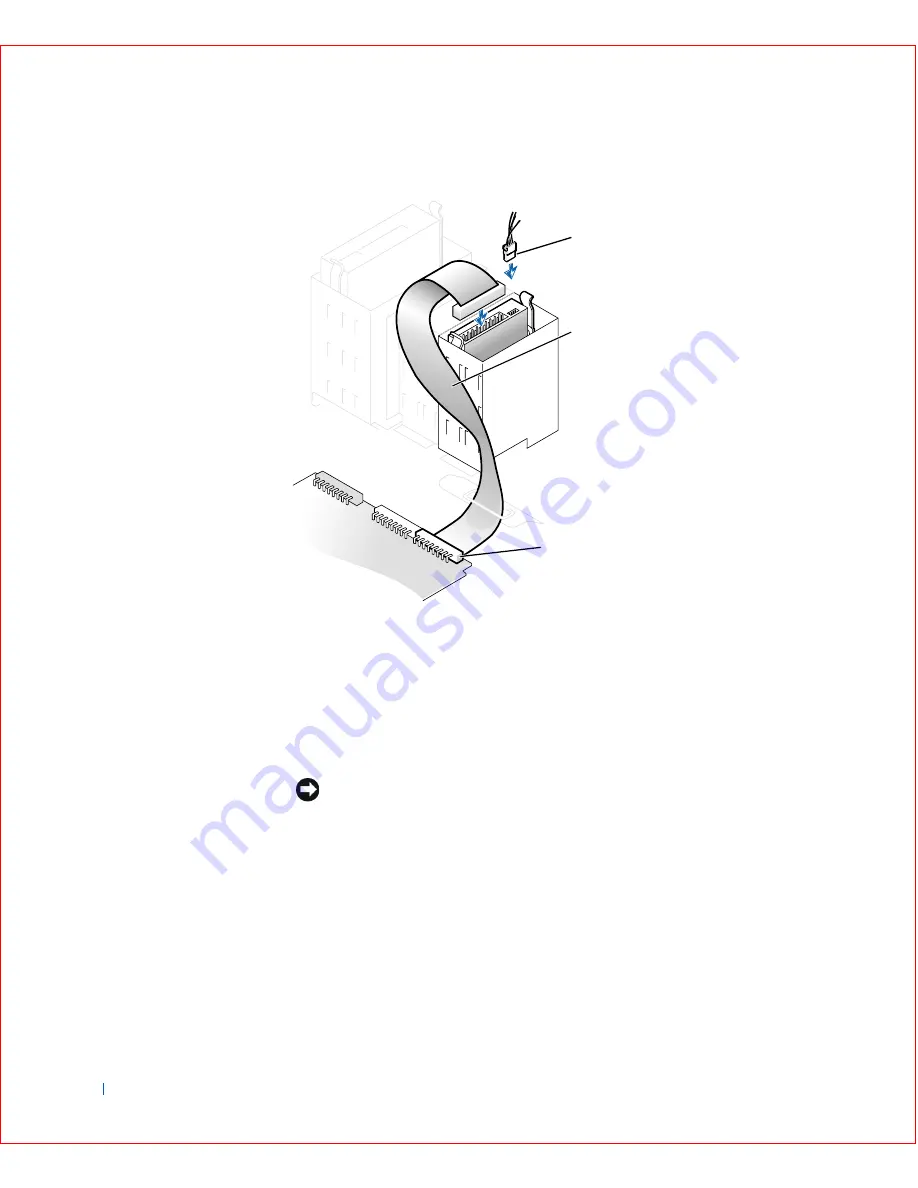
Check all connectors to be certain that they are properly cabled and
firmly seated.
NOTICE:
To avoid possible damage to the computer, you must match the
colored stripe on the hard drive data cable with pin 1 on the hard drive (IDE1)
connector and with the system board interface connector (IDE1).
To locate the IDE connector 1 (IDE1) on the system board, see
“
System Board Components
.”
3
On the small desktop computer, replace the hard drive shroud by
inserting the two tabs on the bottom into the holes in the computer
and snapping the top into place.
4
Close the computer cover
, reconnect your computer and devices to
their electrical outlets, and turn them on.
1
Power cable
2
IDE cable
3
IDE1 connector
3
1
2
Summary of Contents for OptiPlex GX50
Page 1: ...w w w d e l l c o m s u p p o r t d e l l c o m Dell OptiPlex GX50 Systems User s Guide ...
Page 10: ...x Contents ...
Page 40: ...38 Abo u t You r C o mp u t er w w w d e l l c o m s u p p o r t d e l l c o m ...
Page 113: ...Installing Upgrades 111 1 Floppy drive cable 2 Lever 1 2 ...
Page 117: ...Installing Upgrades 115 S ma l l D es k t op C om p u te r Small Mini Tow er Comput er ...
Page 136: ...134 Ins ta l l i n g Up g r a d es w w w d e l l c o m s u p p o r t d e l l c o m ...
Page 154: ...152 Microsoft Windows XP Features w w w d e l l c o m s u p p o r t d e l l c o m ...
Page 162: ...160 Te c h n ic a l Sp e c if ic a tio n s w w w d e l l c o m s u p p o r t d e l l c o m ...
Page 210: ...208 So lv ing Pr o ble m s w w w d e l l c o m s u p p o r t d e l l c o m ...
Page 232: ...230 Ge tt ing Help w w w d e l l c o m s u p p o r t d e l l c o m ...


